SAML Application in Okta
In order to configure Infiniti to use Okta as an identity provider, firstly set up an application in Okta.
Configure Okta (SAML Identity Provider or “SAML IdP”) with the details of Infiniti (the new SAML Service Provider or “SAML SP”).
Below are the steps to set up Infiniti as a SAML application in Okta:
- Log in to your Okta organization as a user with administrative privileges.
- Click on the blue “Admin” button.

- Click on the “Add Applications” shortcut.

- Click on the green “Create New App” button.

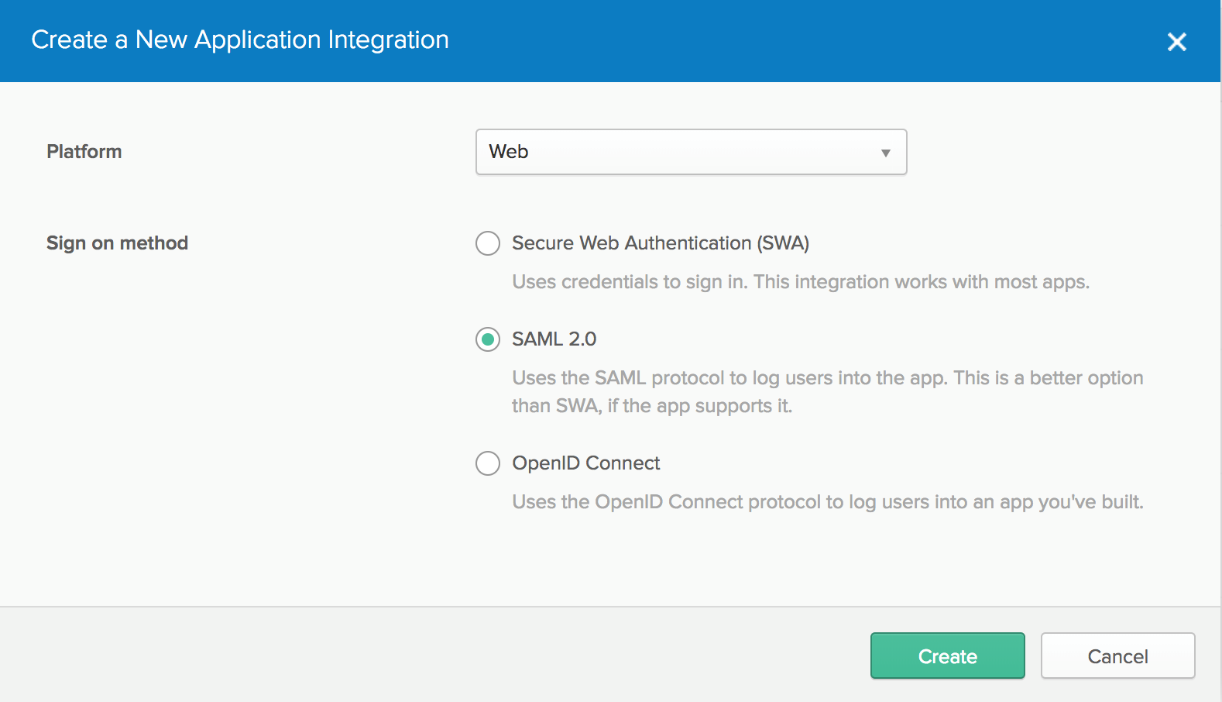
In the dialog that opens, select the “SAML 2.0” option, then click the green “Create” button.
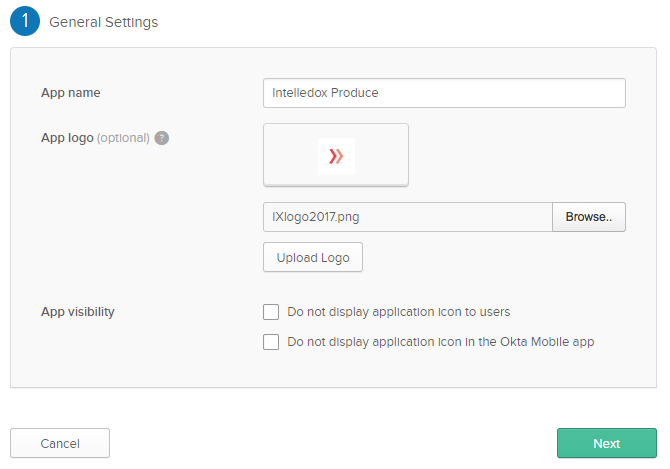
- In Step 1 “General Settings”, enter “Intelledox Produce” in the “App name” field, then click the green “Next” button. You can optionally upload a logo to show on the Okta applications screen.
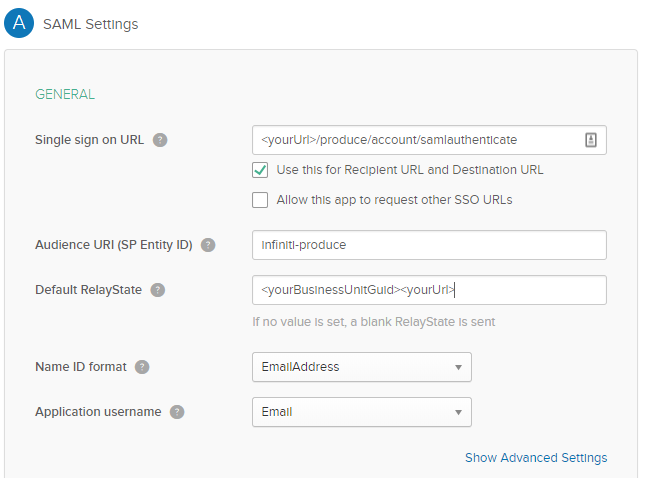
- In Step 2 “Configure SAML,” section A “SAML Settings”,
yourURL> | The URL to the application homepage, Manage or Produce |
Single sign on Url | Unique to Manage and Produce, this URL takes the form of appending /Account/SamlAuthenticate to |
Audience URI (SP Entity Id) | This is the unique value in the system which will be used in the Manage SAML configuration screen. It will be unique for Manage and unique for Produce. |
Default Relay State | This field is a concatenation of the business unit guid of your Infiniti instance and |
Name ID Format | Set to the entry EmailAddress |
Application Username | Set to the entry Email |
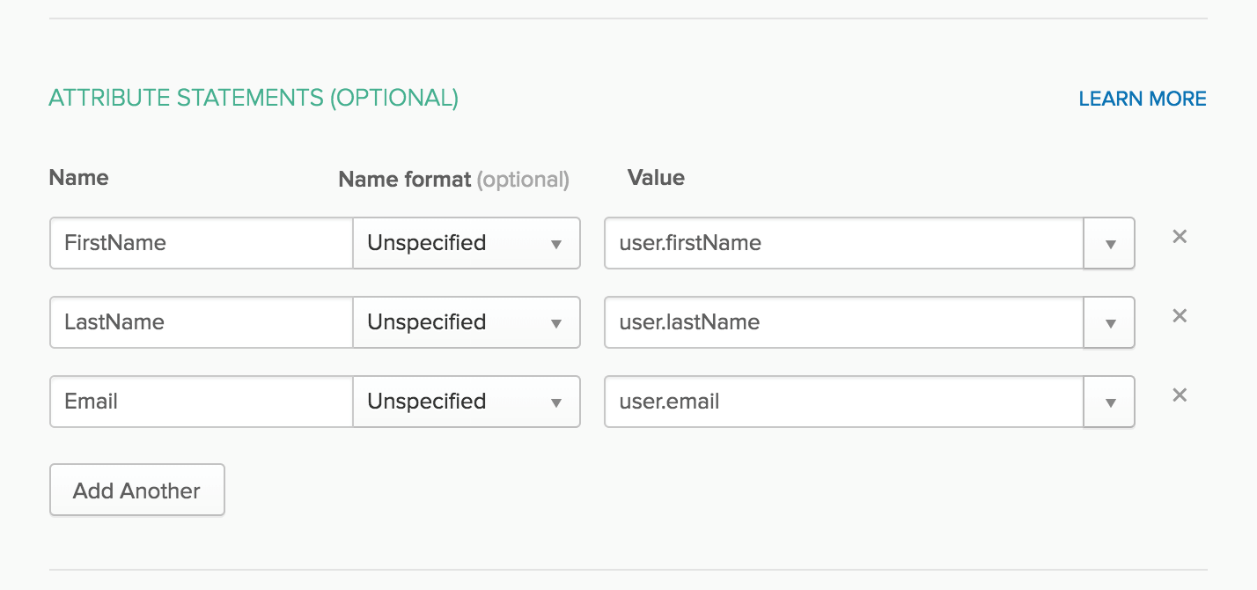
- In the “Attribute Statements” section, add three attribute statements so the values are available for User Profile Mapping in Manage:
- “FirstName” set to “user.firstName”
- “LastName” set to “user.lastName”
- “Email” set to “user.email”
If you’re using Group Memberships in Okta and would like those memberships passed to Infiniti then in the "Group Attribute Statements" section add an assertion name and set the filter to "Regex" with a value of .* as pictured below.

In this configuration the assertion is named oktaGroups, and the Regex is set to pass all group memberships for the logged on user.
Click Next to continue.
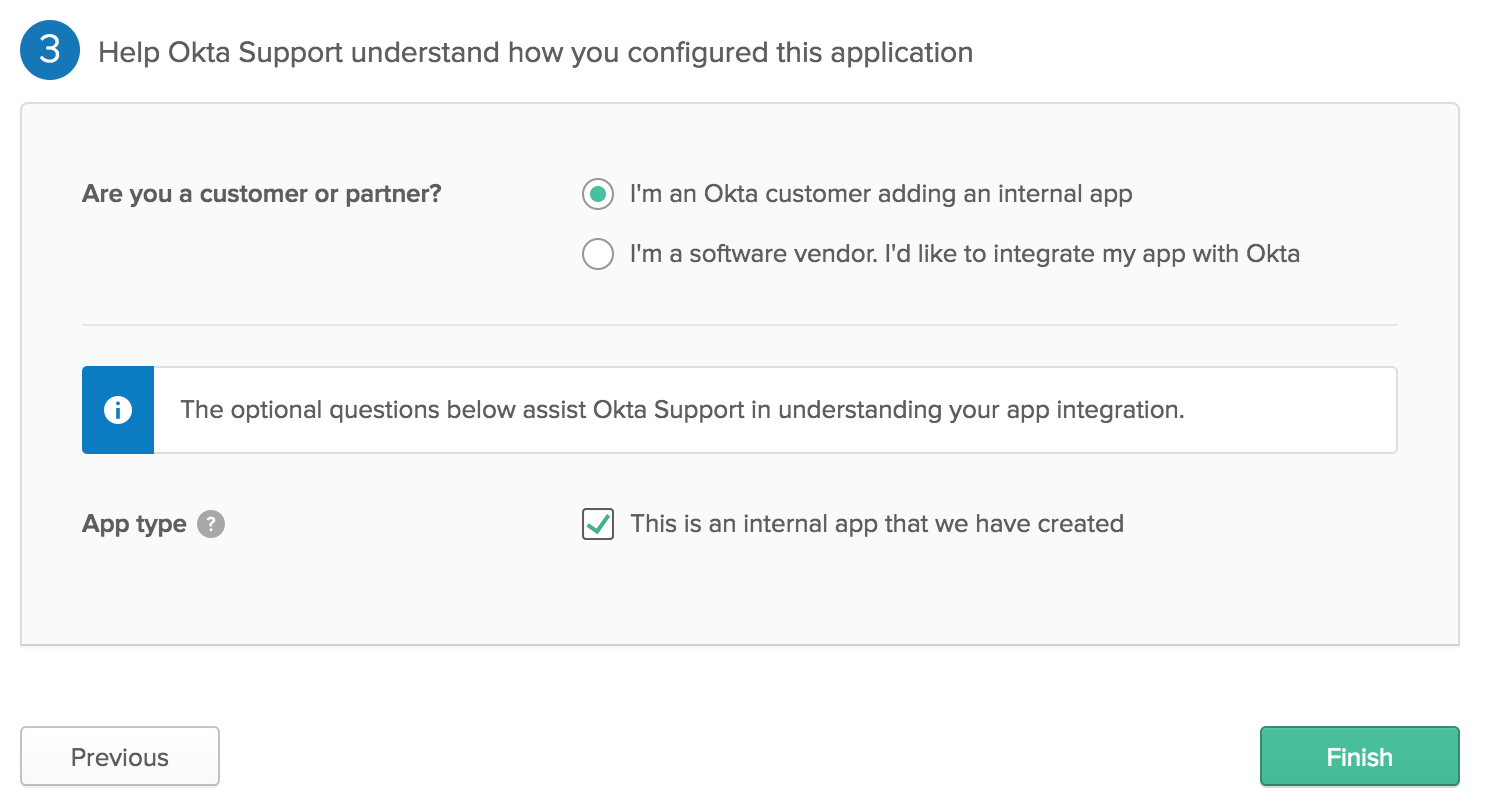
8. In Step 3 “Feedback” , select “I’m an Okta customer adding an internal app” and “This is an internal app that we have created,” then click "Finish".
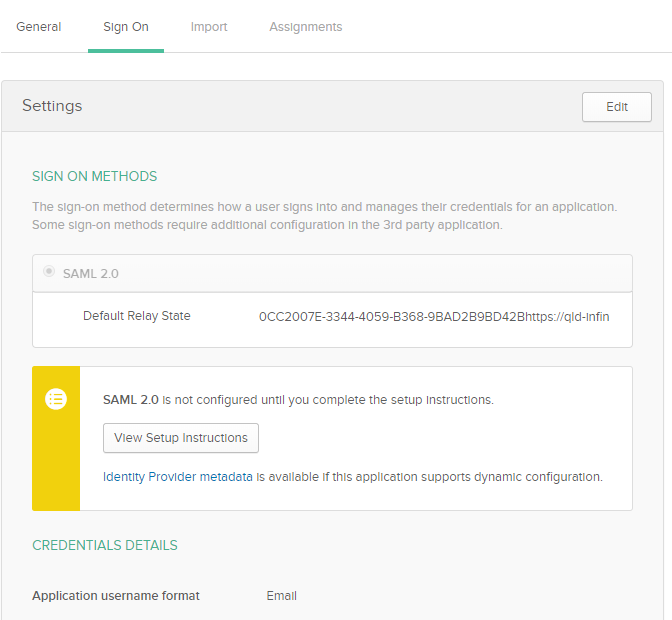
- The “Sign On” section of your newly created “Intelledox Produce” application appears. Keep this page open in a separate tab or browser window.
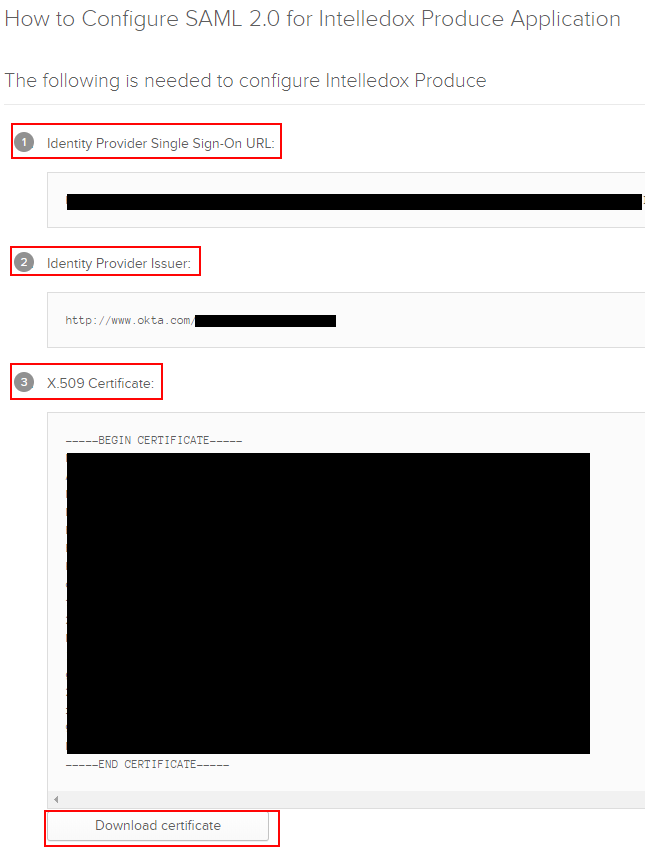
Clicking “View Setup Instructions” reveals the detail required for configuration of Infiniti.
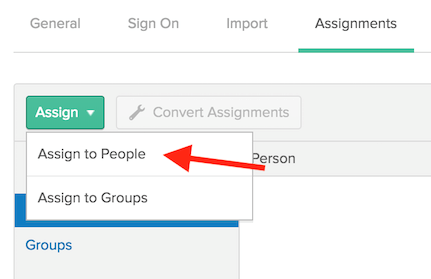
- Right-click on the “Assignments” section of the “Intelledox Produce” application and select “Open Link In New Tab” (so that you can come back to the “Sign On” section later).
In the new tab that opens, click on the “Assign” button and select “Assign to People”
- A dialog titled “Assign Intelledox Produce to People” opens. Type your username into the search box, select the “Assign” button next to your username.

- Verify the user-specific attributes, then select “Save and Go Back”.
- Click “Done” to exit the assignment wizard.
Repeat the process now for the application Intelledox Manage. Both applications need to be configured prior to moving to the next section.
You are now ready to configure SAML in your application. The information in the tab you opened in step 10 contains the information needed to configure SAML in your application.
Configure Infiniti SAML Settings
Open the Infiniti Manage application and log in as an administrator with Change Settings permission. Click "Settings" on the left-hand menu and “SAML 2.0” from the tabs that load.
Complete the set up as below:
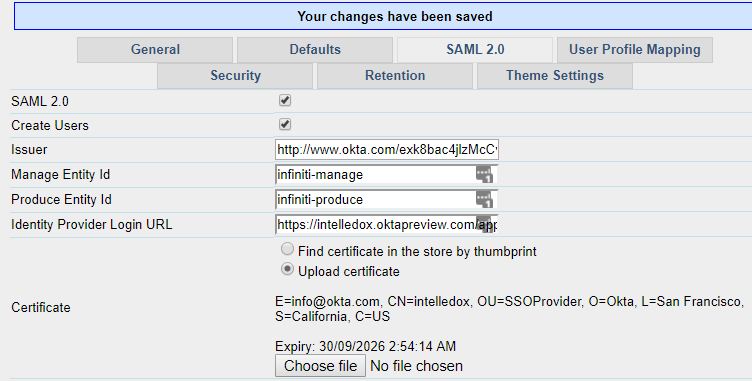
The entries are as follows:
SAML 2.0 | Checked |
Create Users | Checked (enables just in time user creation) |
Issuer | This value is available behind the “View Setup Instructions” button from the previous section in Step 10 within Okta. It is labelled “2 Identity Provider Issuer”. |
Manage Entity Id | As created as the Entity Id in Okta in Step 7 |
Produce Entity Id | As created as the Entity Id in Okta in Step 7 |
The Identity Provider Login URL | This value is available behind the “View Setup Instructions” button from the previous section in Step 10 within Okta. It is labelled “1 Identity Provider Single Sign-On URL”. |
Certificate | Upload the certificate being used for SAML, it is downloadable from the “View Setup Instructions” button in the previous section in Step 10 within Okta. It is labelled “3 X.509 Certificate”, there is a "Download Certificate" button at the bottom. |
Log Mode | Checked (when testing, any single sign on failures will log on this screen if checked) |
Click Save.
Configure Infiniti User Profile Mappings
The user profile mappings functionality of Infiniti will map the assertions created in step 8 to fields on the users Infiniti profile.
Open the Infiniti Manage application and log in as an administrator with Change Settings permission. Click "Settings" on the left-hand menu and “User Profile Mapping” from the tabs that load.
In this example, the assertions are mapped to bring over the user’s name, email and group memberships.
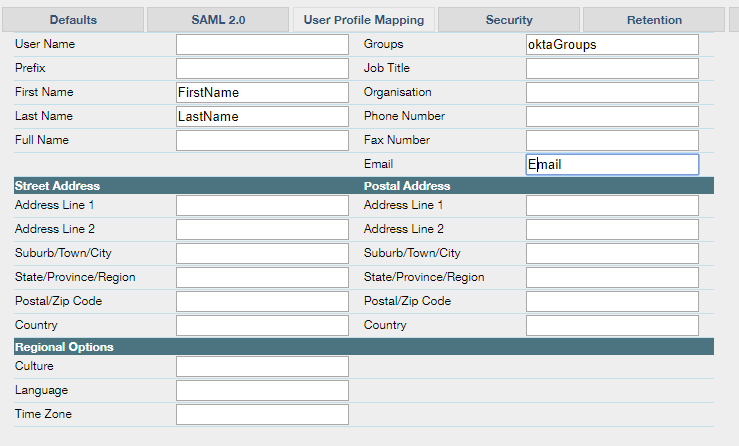
Click Save.
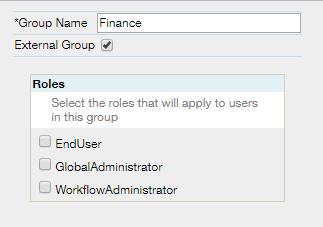
To complete the group membership mapping, the Groups must exist in Infiniti and be marked as “External Group”.
Here is an example group named “Finance”, which is prepared for a group assertion of the same name.
The system will now accept new sessions using SAML credentials but no one will be an administrator UNLESS your current Infiniti Username is the same as your Okta Email. While maintaining the current Manage session, open a browser window in incognito mode (or a different brower, e.g if you are using Chrome then load Internet Explorer) and navigate to Produce. This will redirect to Okta, allow you to log on and will pass you into Produce as a new created user.
From your previous Manage session, you will now see a User in Infiniti with your Okta Email that you can elevate privileges on.
If you receive a Single Sign On Failed, the additional information on the error will be on the SAML settings screen when Log Mode is on.
Updated 9 months ago
