Workflow States
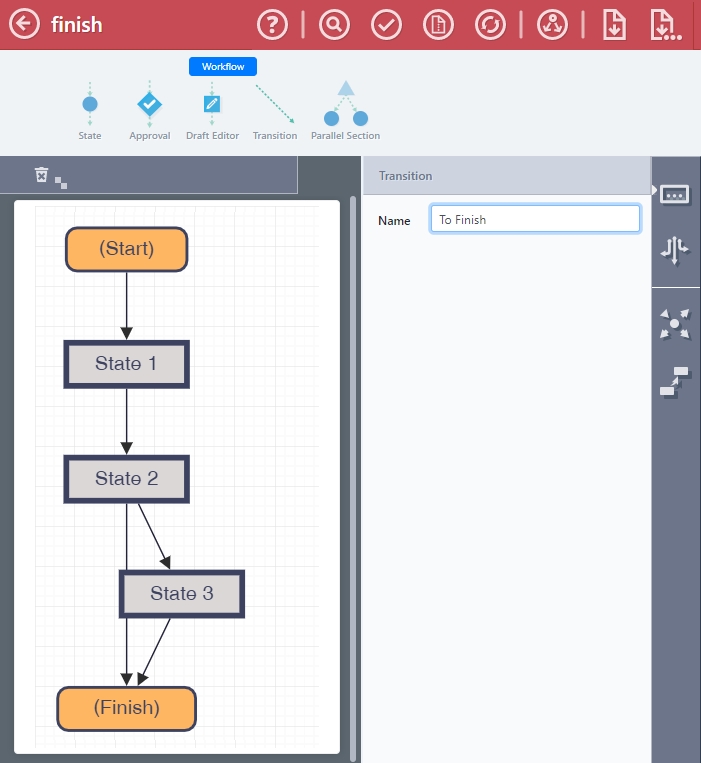
A workflow state represents a stage or steps in the workflow process. The number of states added to a workflow will determine the number of steps the workflow will go through or the simplicity or complexity of the workflow.
Usage
- Drag and drop states into the workflow. For more information, refer to state types.
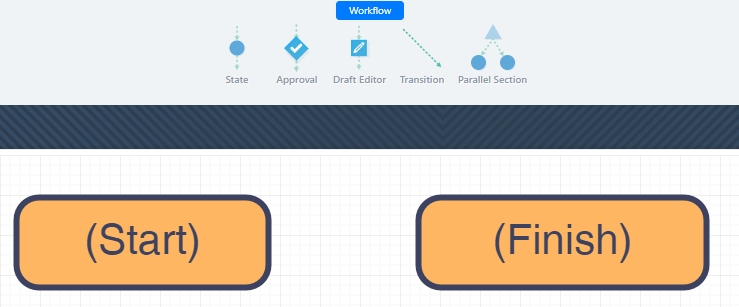
- Drag and drop a Transition into the state you want to transition from.
- Validate the workflow settings.
- Save the project.
Types of States
(Start) State
By default, all workflows start with this state. The (Start) state can be renamed but not deleted.
State Properties
-
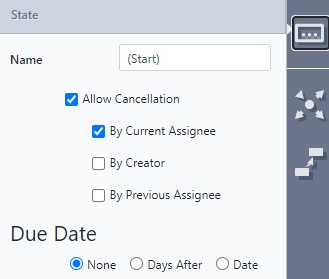
Name – By default, a new state is called 'State #' but the name can be changed at any time. However, each state name must be unique.
-
Allow Cancellation – Gives the option to stop or cancel the workflow at this particular state by the following:
-
By Current Assignee – (Default) The person currently assigned to the workflow. This user can click the Cancel button from the Home page or a Dashboard.
-
By Creator – Whoever submitted the first form
-
By Previous Assignee – The person who assigned the workflow to the current assignee
-
Due Date – Set a due date for triggering escalations. Available options are:
-
None – No Due Date
-
Days After – Number of days after the workflow reaches this particular state. Optionally, the Designer can select only Weekdays.
-
Date – Specific date using a reference question in the form (Calculated via Formula or Date Questions type).
Approval State
The Approval workflow state is a placeholder for the form using an approval function. When added to the workflow, the user can select an approval from the drop-down list of available approvals that have already been configured in Manage. See Approvals.
Approval Properties
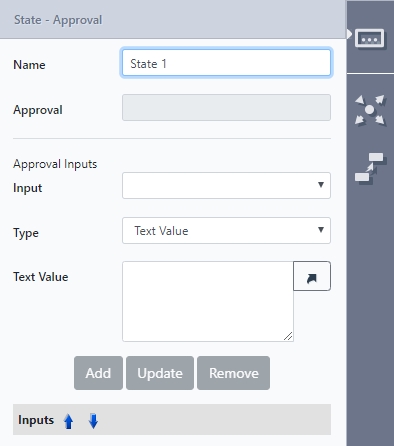
- Name – By default, the name of the selected Approval. This can be renamed at any point.
- Approval – The name of the selected Approval.
- Quick Approval – Enabling this option gives the Approver the ability to quickly approve or reject the request from the Produce dashboard.
- View type – Select from Form or Summary:
- Form – The form is displayed using pages and the Approver will have to use the Next and Back buttons to view the request.
- Summary – Shows all the fields on one page using a form summary view. Useful for small to medium sized forms, where the request can be displayed without too much scrolling. The following configurations are available for summary view:
- Collapsible pages – Group pages in an accordion style tab group
- Include All Multiple Choice Answers – Displays all the answers and highlights the selected answer.
- Answered Questions Only - Only include questions that have been answered.
Approval Input:The Approval Input section will only display if Approvals > Clause Builder type in Manage has been set to User.
Draft Editor State
The Draft Editor state can be used to edit a SmartCOMM generated document based on the Project ID, Template Selector Resource ID and a selected Data Model Template. A Draft Editor state can also be added multiple times for the same document with a revised draft available for document, if this setting has been configured. See Draft Editor.
Differences between state and Draft Editor state:
- Access – Normal state is part of SmartIQ and is always available with the product. The Draft Editor state can only be used if you have an equivalent SmartCOMM instance and account and if Draft Editor has been activated on that account.
- Property configuration – You can configure various settings on the normal state while the draft editor state pulls the information from the SmartCOMM templates. This is why you have to specify the name, project ID and template selector resource ID. Draft Editor uses these information to pull the specific template and configurations from SmartCOMM.
- Interface – The normal state will show question pages and/or fragments while Draft Editor will show a single page with the embedded draft editor interface.
- Temporary user– Draft Editor states cannot be assigned to Temporary users.
- Transition properties - There is an additional option to Reset Drafts for transition to Draft Editor. This option means that changes made to the document in previous Draft Editor states (if any) will be discarded and the answers from the workflow will be used for a regenerated draft. This option is default set to ON.
- Draft Generation - The initial generation of each draft is done on the transition leading onto the Draft Editor state. If subsequent draft editor states in the workflow share the same project ID and resource ID and the Reset Draft property is unchecked, the previously generated/edited draft content will be reloaded, not re-generated.
- Draft Documents – New “Draft Editor Output” documents are available for download on the finish page, action inputs or transitions that take place after draft editor states. Only a single instance will be available for each single draft.
Draft Editor Properties
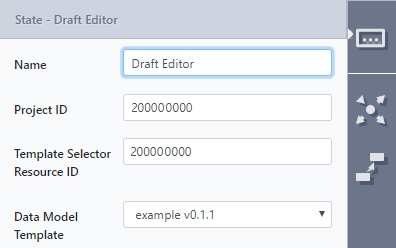
- Name – Name of the state as well as the name of the generated output document of the finalised draft editor.
- Template Selector Project ID and Resource ID – These uniquely identity the document in SmartCOMMs. Logon to the SmartCOMMs cloud instance to obtain these two values. Additionally, SmartIQ uses the Project and Resource ID to identify the specific template that will be used to generate this individual draft document.
- Data Model Template – This selects the data model that will be used generating the draft document. The drop down menu will only show a list of SmartCOMM Data models that have been added onto the finish page section in Design. Any other templates will not be shown. This setup is identical to the SmartCOMM action and requires a version to be selected.
(Finish) State
Updated 9 months ago
