Azure Active Directory
Using Intelledox OOB SAML 2.0
Configure Azure
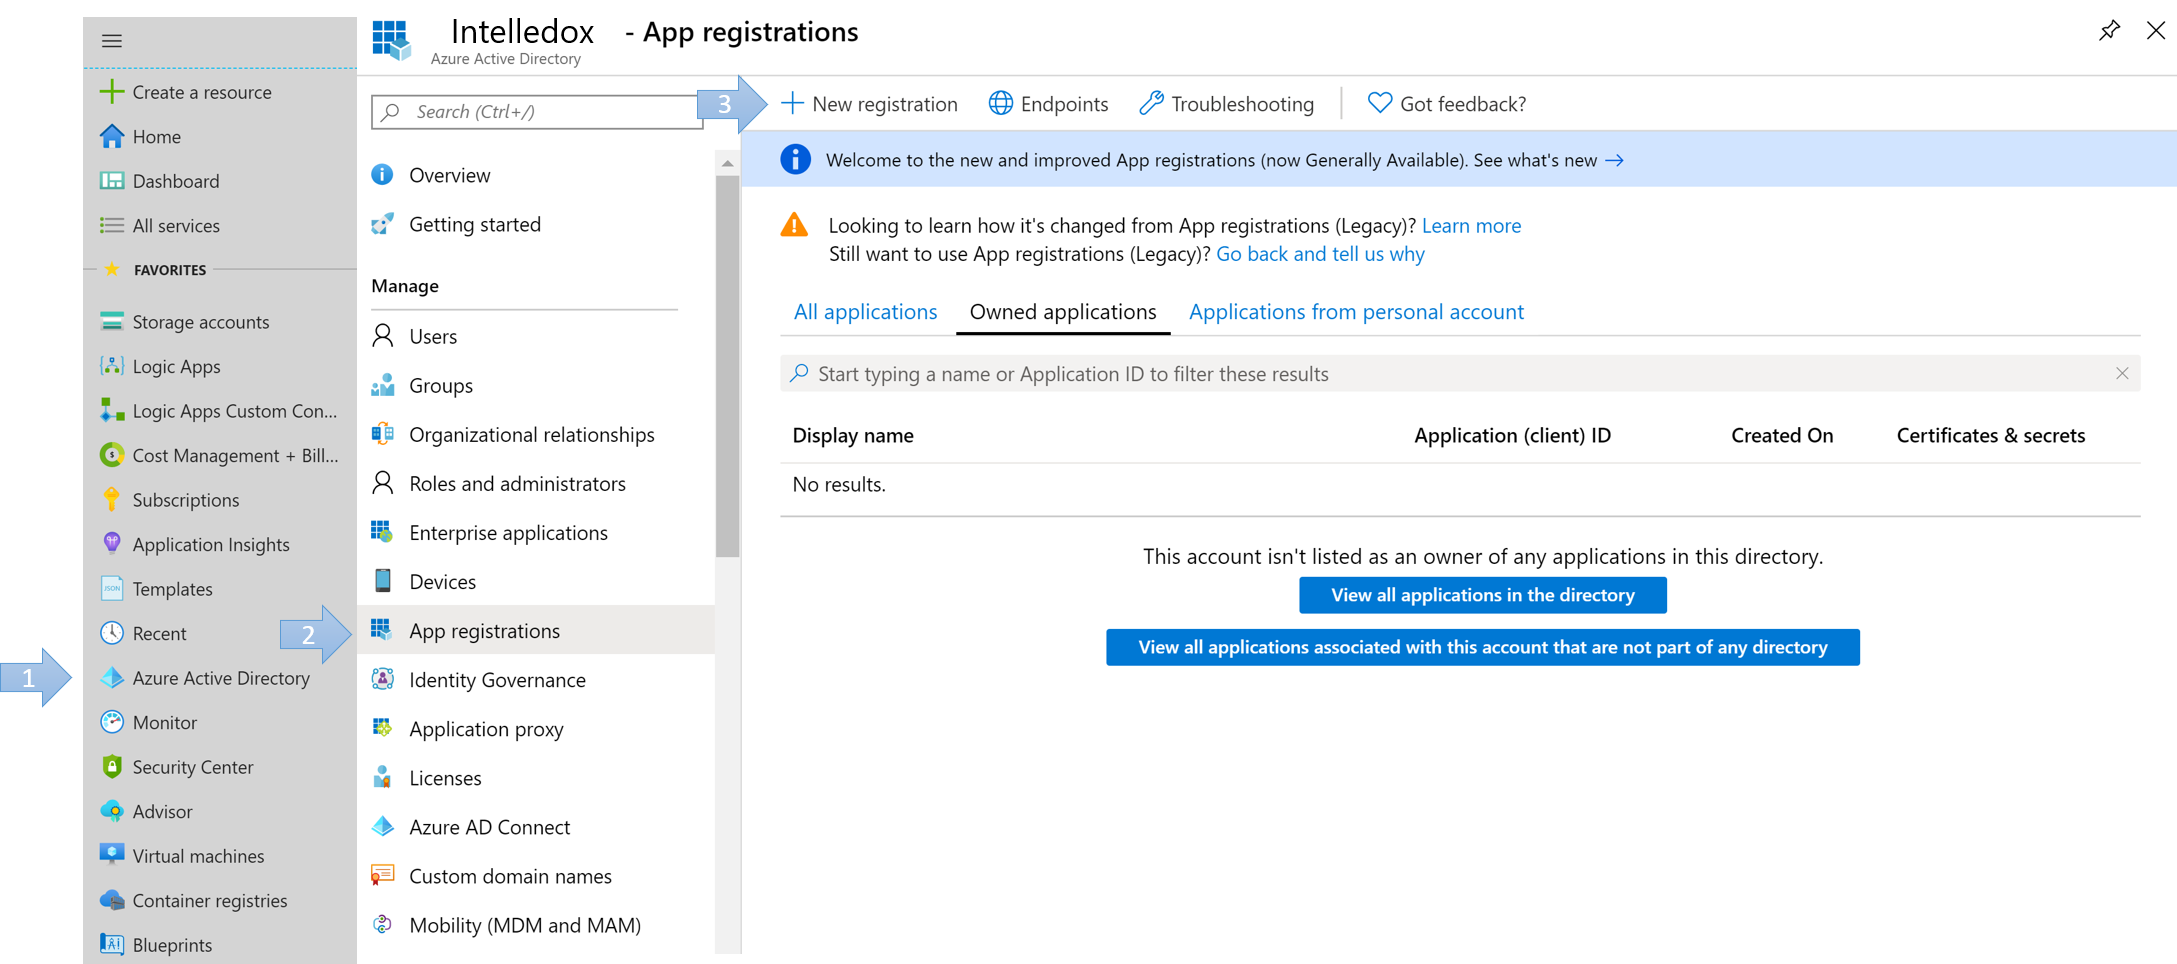
- Navigate to Azure Portal
- Select Azure Active Directory from Portal menu.
- App Registrations > New Registration.

- Name: YourAppName
- Supported account types: Accounts in this organizational directory only (YourCompanyNameHere)
- Redirect URI (optional):
- Type: web
- Value: https://YourApp.com/manage/samlauthenticate.aspx
- Click Register
- Navigate to the newly registered web app and click the Authentication blade.
- Create a new Redirect URI path
- Type: web
- Value: https://YourApp.com/produce/samlauthenticate.aspx
- Click Save.
Redirect URI'sYou should now have 2 Redirect URIs. One for
/Manageand one for/Produce.
SAML 2.0 Parameters
- Navigate to the newly created app registration overview. Application (client) ID will be Manage Entity ID and Produce Entity ID used later in this guide.
- Navigate back to the list of App Registrations and click on Endpoints tab.
- Identify the Federation Metadata Document url, this will be the MetaData URL needed later in this guide.
Configure Intelledox
- Log into Manage and navigate to Settings on the left menu.
- Click SAML 2.0 tab.
- Enable SAML 2.0 Checkbox to enable editing.
- Enable Create Users
- Manage Entity Id: Paste the Application (client) ID done in step 1. of previous section.
- Produce Entity Id: Paste the Application (client) ID done in step 1. of previous section.
- Metadata Url: Paste the Federation Metadata Document done in step 3. of previous section.
- Click Save.
ConfigurationNotice how the rest of parameters are auto populated.
User Profile Mapping
- In Intelledox Manage > Settings. Click User Profile Mapping.
- In a separate browser tab, open the Metadata Url and gather the appropriate Uri attributes to be mapped. Should be something like:
Uri="http://schemas.xmlsoap.org/ws/2005/05/identity/claims/emailaddress"

Find AttributesCTRL+F for
Updated 9 months ago
