SmartCOMM Action
Overview
This action can be used to link to a SmartCOMM Data Model and Template Selector and generate a document as output that is available to Intelledox.
Inputs
Mandatory Inputs
Input | Description |
|---|---|
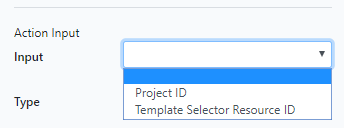
Project ID | The pid of the SmartCOMM project that contains the data model and template selector. You can find this as part of the url when you open your SmartCOMM project. |
Template Selector Resource ID | The rid of the SmartCOMM template selector that will be used to generate the required document. You can find this as part of the url when you open your selector in SmartCOMM. |
Outputs
Output | Description |
|---|---|
SmartCOMM Output | The document generated by the template selector and data model. Depending on the SmartCOMM channel the template selector is configured for, this may be of type .html (Email or Website), .txt (Plain Text or SMS), .afp, .pcl, .pdf, .ps, .tiff or .xml (Print) or .docx (WordML) |
Connector Settings
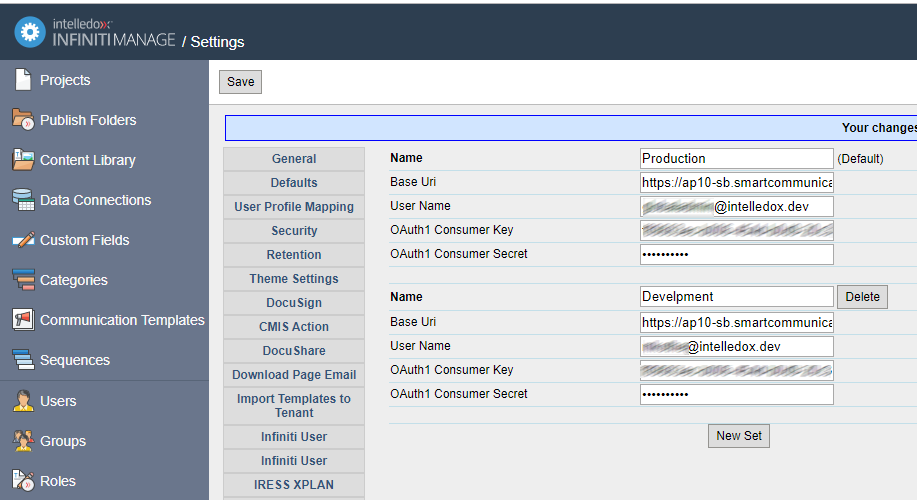
Obtain a license for the SmartCOMM action and add it in Manage.
- Base Uri: This will be of the form: https://
<server>.smartcommunications.cloud/one/ - User Name: The username for the SmartCOMM account to be used.
- OAuth1 Consumer Key: This is available from the SmartCOMM account setup under Settings > Security > View API Keys. Ensure the signature method is HMAC-SHA256.
- OAuth1 Consumer Secret: This is available from the SmartCOMM account setup under Settings > Security > View API Keys
Multiple SmartCOMM accountsClick the New Set button to configure additional SmartCOMM accounts (eg: Dev and Production).
Design
This section deals with the usage of the "SmartCOMM" action.
Add the Action
In Design, open a project and add an action (click the Finish page, then click the Action icon in the right-hand column).
Select "SmartCOMM" from the menu and drag to the Finish page
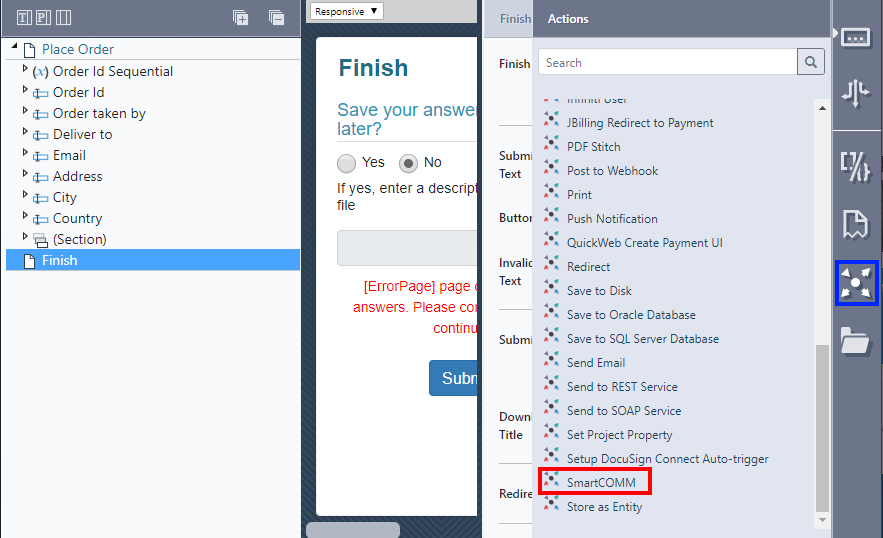
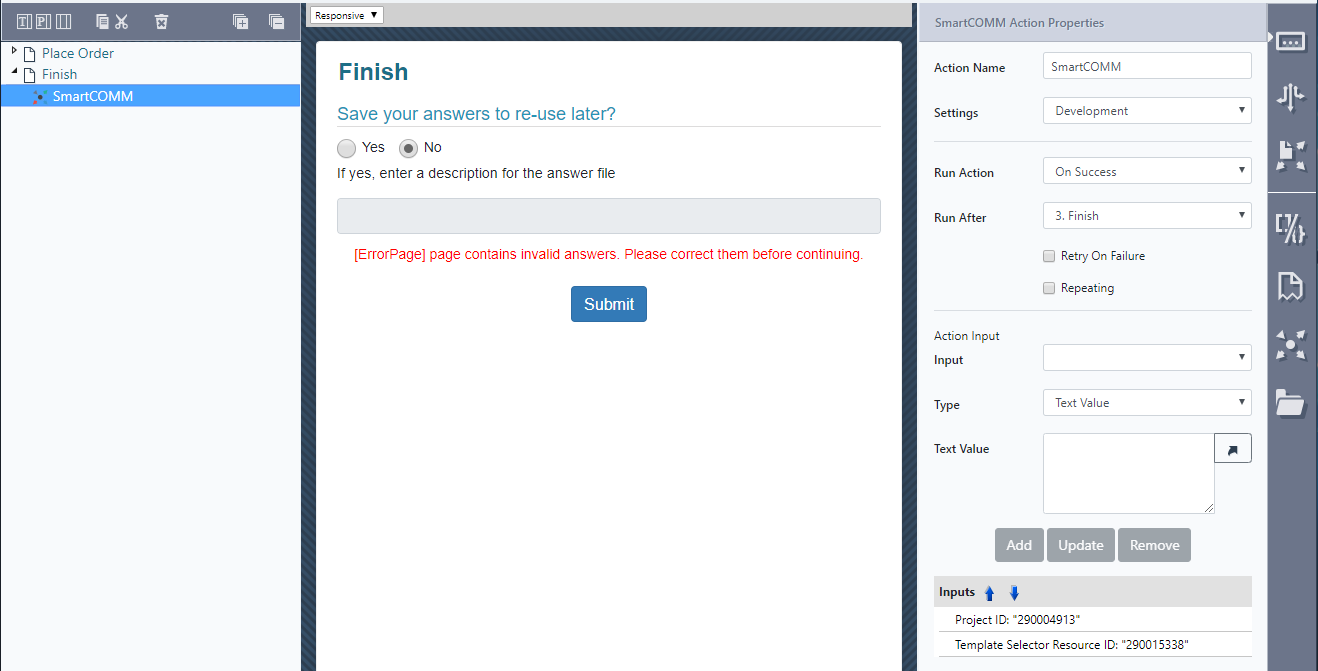
Once selected, the following action is displayed for configuration:

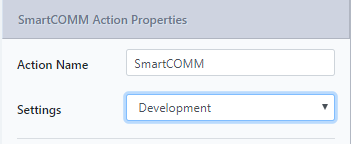
Using the right-hand panel check if you have multiple SmartCOMM accounts configured. If so, ensure the correct account is selected in the Settings option. If you have no settings option, you will only have a single account which will be used by default.
Now expand the "Inputs" section. The following inputs can be configured for this action
Select the required inputs and configure them accordingly (based on the present project). An example is provided below:
Add the Data Model
For how to add a Data Model see here
Reference the Data Model from the Action
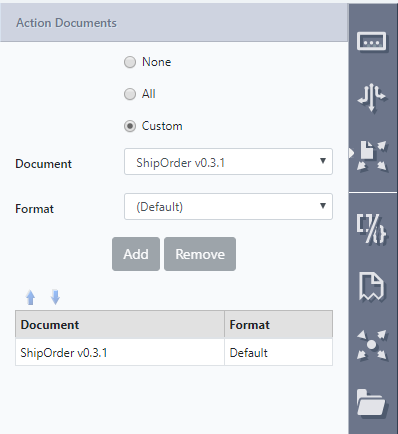
Click on the action and choose the documents icon from the far right panel.

Select the Custom option and then choose and Add your chosen Data Model to the action as a document.
Now when you run the project, the Data Model will be filled according to the answers matched to the placeholders, this will be then be supplied to the Project and Template Selector specified and the resulting document generated. The document will be available for download and will also be available to subsequent actions for use eg: emailed, saved to disk etc.
If you have multiple SmartCOMM templates you want to use, you can add as many Data Models and/or Actions as are needed.
Updated 9 months ago
