Introduction
Introduction
Intelledox Workflow allows mapping business processes where different users collaborate at a different time. To access the Workflow canvas, click this icon in the top menu.

If this icon doesn't appear in Design is because you don't have the workflow license. Contact your representative at Intelledox to arrange it. Once you have received a valid workflow license, follow the below steps to add the license to Intelledox.
- Login to Infiniti Manage.
- Click Licensing in the left navigation.
- Click Upload New License File.

- Your Workflow license will now appear in the Modules list.
See Installation > Test and License for more information.
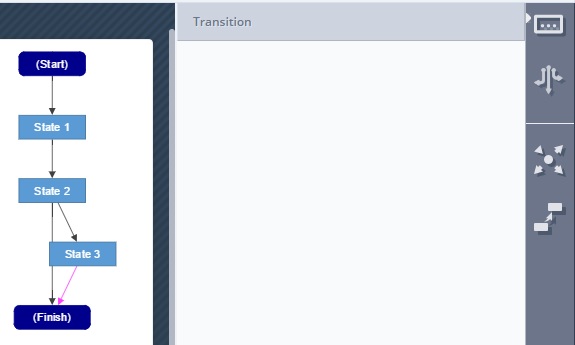
This is the Workflow canvas:
States
A workflow state represents a stage or steps in the workflow process. The number of states added to a workflow will determine the number of steps the workflow may contain.
(Start) state
By default, the (Start) state will already be present in the States list. (Start) will always be the state used when first running the project in Produce. The (Start) state cannot be renamed or deleted.
Adding States
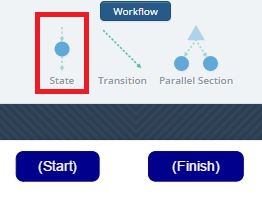
To add extra states to your workflow drag and drop the state question into the workflow.

State Properties
Name
By default the added state is named 'State #', however, you can rename at any point.
NoteState names must be unique.
Allow Cancellation
Allow terminating the workflow at this particular state. Following options are available:
- By Current Assignee
- By Creator
- By Previous Assignee
This option will be displayed in Produce as follows:
Due Date
Allows to define a due date for this particular state, when due date condition is met, escalations will be triggered. Here available options:
- None: No Due Date defined.
- Days After: Number of days after workflow reaches this particular state (optionally Designer can select Weekdays only).
Date: Allows to reference a question in the form to take the appropriate date (Calculated via Formula or Date Questions type.)
Final State

Transitions
A transition is a link between two states. Transitions will determine the flow of states.
Adding a Transition
To add a transition between two states you need to drag and drop the Transition question into the state you want to transition from (for example, (Start) state will be the first state that requires a transition).
You will now need to select which state you would like to transition to and click OK.
The transition is now added underneath the state in the 'States' view of the workflow window. It will have the same name as the state it is transitioning to.
Properties
Name
Optionally designers can specify a name of a transition.
Assignements
Defines who will receive a workflow state after a transition is done under the Send To properties for a transition.
Send To
- Creator: Selecting Creator as the Send To value will return the workflow to the user that created the workflow project. This option is not available in the (Start) state.
- Current User: Similar to Creator, selecting Current user will return the workflow to the current user that completes the workflow step.
- Previous: Similar to Creator, selecting Previous will return the workflow to the user or group who was assigned to the workflow of the state before this one. This option is not available in the (Start) state.
- User: Select from all active users in the Infiniti system.
- Group: Select from all groups in the Infiniti system. This will send the workflow to all active users within the group selected, however, the first user that accesses it will be the only one that can continue the workflow process.
- Temporary user
Send to Type
- Specified: Pre-assign the workflow state to an existing user or group.
- Search: Allow the user who is completing the workflow to assign the next step to a user or group.
- Question Reference: Select an existing question to define the next user or group for the workflow step.
Send Email
- Send Email (ON by default): This will send an email to whoever the state is assigned to.
- Email Subject: Define the subject for the email that gets sent for the transition.
- Email Body: Define the body of the email that gets sent for the transition.
The Email Subject and Email Body have defaults that are the same as what currently gets sent for Transitions.
They support Question References as well as four keyword references:
[ProjectLink]: Puts in a link to the task in Produce.
[Comments]: The comments added before submission.
[ProjectName]: Name of the Project.
[StateName]: Name of the State that has been transitioned to.
Start Page
Allows the designer to specify on which particular page the form will be loaded, especially relevant for circumstances where the first page is not appropriate.
Display Options
- Page Title: Title of the page where the user decides assignment for next state.
- Help Text: Help Text displayed on the final page where the assignment is defined by the user.
- Show Next Steps: Displays Name of next State.
- Show Comment: Includes textbox that allows the user to include comments.
- Comment Mandatory: Enforces user to provide a comment.
- Default Comment: Default comment included in comments textbox.
- Submit Button Text: Button Text.
- Submitting Text: Text displayed after for is submitted for workflow transition.
- Redirect on Finish
Redirect to Home
A checkbox is available labelled "Wait for the project to finish processing before redirect". If this box is checked, a submission and data object synchronization will take place before the user is redirected to the home page. If the box is not checked, the redirect happens immediately and the project submission will happen in the background.
Redirect to Project
Allows selecting published project to be redirected to. Note that an additional option Include Project Properties is displayed, allowing to specify project property values.
Redirect to Url
Allows specifying to which URL the project will be redirected. Note that this can be a reference or hardcoded value.
All options have Online Message on Redirect property.
Redirect on Finish
Downloads
Allows the designer to specify documents to be available to be downloaded when the transition is triggered.
Transition Conditions
In some cases, a state may have multiple transitions to other states. For example, if the workflow is an approval process and the workflow is approved it will go to one state, and if the approver doesn't approve it may go to another state. This can be defined within the transition conditions.
Transition conditions work the same as all other conditions within Infiniti, however, the only available condition type is Answer Value.

Adding Actions to workflow transitions
Actions can be added to transitions in a workflow.
- Open the workflow canvas in Design.
- Select the workflow transition where one or more Action needs to occur.
- Click on the Actions Button located on the right side menu.
- The Actions list will pop up.
- Drag and drop the action(s) you would like to add to the transition.
NoteAction Properties are displayed when you select the desired Action.
Reordering actions
In the web designer, on the workflow page, where we show a graphical representation of the workflow, users now have the ability to reorder the workflow actions just like the finish page actions.
Note:Actions can be reordered only within the same transition and NOT across transitions, as that would be MOVE and not REORDER
The reordering can be done in two ways:
-
Grab the action which needs to be reordered and drop it on any other action in the same transition, this will result in the grabbed action to appear before the action on which it is being dropped.
-
Grab the action which needs to be reordered and drop it on any transition(arrows between two actions or between the first/last state and an action), this will simply result in the action to appear where it was intended.
Executing one of the above will enable the SAVE button, and you can then either confirm or cancel changes.
Video
Updated 10 months ago
