
Manage - Left Panel Menu Items Overview
The left panel is the heart of Manage. The different menu items present in the left panel helps the user to perform all the administrative activities. The different menu items are as follows:

Projects
When the user clicks on the Projects menu item in the left panel, they will see the different folders currently present in SmartIQ . When the user clicks on a particular folder, the corresponding projects present inside that folder will be displayed.
For example, in the below screenshot, we have a folder Dashboard in SmartIQ and when we click on the Dashboard folder, we see the different projects inside this Dashboard folder.

When you choose a project from the Projects list, if the project is of type Fragment Page/Fragment Portion, there is a button on the button bar as 'Projects'. Clicking this button, a user can view the list of projects that use the selected fragment. The projects from the list can be edited or not based on the same logic that is applied to the project list page which checks for user permission on the content folder.
The additional features provided under this Projects menu item includes:
- New Folder: To create a new folder.
- Edit Folder: To specify groups that can make changes to existing folder content in Manage or Design.
- Delete Folder: To delete an existing folder.
- Import: To import an SmartIQ project.
Error Message information on Import ProjectsWhen performing "Import Project" from Manage UI or Admin API, if there is a failure, descriptive error messages can be viewed in Manage UI and Admin API respectively
Making changes to Project VersionsProject Names can be configured in Design under Project Properties
Publish Folders
When the user clicks on the Publish Foldersmenu item in the left panel, they will see the different published folders currently present in SmartIQ . When the user clicks on a particular folder, the corresponding projects present inside that folder will be displayed.
The different projects published inside these publish folders projects can be accessed by the user in Produce.
For example, in the below screenshot, there are two folders and the different projects published inside the folders.

When the user navigates to Produce, the folder names act as the heading under which the different projects are shown.

The additional features provided under this Publish Folders menu item includes:
- New Folder: To create a new publish folder.
- Edit Folder: To edit an existing publish folder.
- Publish Project: To publish a SmartIQ project so that it is accessible to the end user from Produce.
InfoOnly published projects are accessible in Produce.
Content Library
Content Library LicenseContact your sales representative if you are interested in obtaining a valid Content Library licence key for your SmartIQ instance.
Content Library acts a repository of contents in SmartIQ . The content of the content library is accessible in the SmartIQ Forms via Content Library question type. SmartIQ supports four types of content items which are as follows:
- Attachment
- Document Fragment
- Font
- Image
- Text
When you click on the Content Library menu item in the left panel, they will see the different content library folders currently present in SmartIQ . When the user clicks on a particular content library folder, they will see the different content items which are present inside that folder.
For example, in the below screenshot, we have a content library folder Dashboard in SmartIQ and when we click on this Dashboard folder, we see an attachment content item present inside this Dashboard folder.
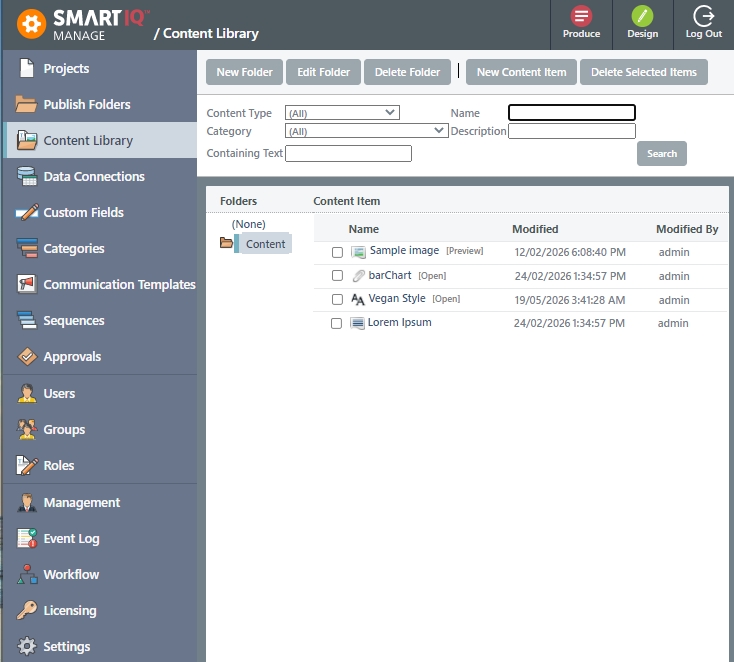
The additional features provided under this Content Library menu item includes:
- New Folder: To create a new content library folder.
- Edit Folder: To specify groups that can make changes to an existing content library folder in Manage or Design.
- Delete Folder: To delete an existing content library folder.
- New Content Item: To create a new content item.
- Delete Selected Item: To delete an existing content item.
Folders can be arranged in a tree-like structure.
InfoThis option would be visible when you have a valid Content Library licence key.
Data Connections
This is the place in SmartIQ where you configure the connections to the external data sources which can be used in populating data in the forms and generated documents output. SmartIQ includes the following generic data connections:
- OLEDB
- SQL Server
- CSV
- ODBC
- RSS Feed
- Web Service
- XML
- SmartIQ
- JSON
- REST
Additional data connections are delivered as third party components to the core platform.
Custom Fields
Additional fields can be added to various areas of the platform such as user profile and address fields. These are accessible within the Design experience and maintained by the API or the user themselves.
-
Fill in the title.
-
Choose the location:
Contact
Group Address
User
Response Metadata -
Choose the type of field:
Text
Date
Image -
Set the field length.
Categories
Categories provide a mechanism to classify content library items as additional collection and search metadata.
Click the New Category button.
Type in the name of the new category.
Communication Templates
Communication Templates allow the designer to create and modify templates which can be used in place of default system emails, and used as the input to some inbuilt Actions and Escalations (primarily Send Email).
For more information, refer to Communication Templates.
Sequences
Define sequences that can be leveraged across SmartIQ forms. They will be created following a specified pattern during run time. Creating sequences requires Design permissions.
For more information, refer to Sequences .
Approvals
The Approval workflow state is delivered as a new type of workflow state and can be added to the workflow by selecting from the dropdown list of available approvals.
For more information, refer to Approvals.
Users
User management for the system is conducted in this section

Clicking the Export button will allow you to export all User information to a .csv file.
Selecting a username will take you to their profile screen. This screen allows to:
- Modify users information and regional settings.
- Delete the User.
- Configure Security (Groups and Roles).

Remember to click Save before leaving this page to commit your changes.
Groups
The Groups section will show all existing groups.
Clicking on the New Group button will take you to a menu where you can create a new group.
- Type in a group name.
- Choose the role:
- End User
- Global Administrator
- Workflow Administrator
You can set the permissions level for the Role name: See the Roles section below:

Group Address
Emails can be sent to a dedicated group email address by entering a valid email address in the Email field. Additionally, emails can also be configured to send to all users in the group by enabling the “Email Individual Group Members” checkbox.

Roles
In the roles section, you can create roles that work for your organization. Create the Role Name, then select from the list of permission that this role should have.

Custom roles can be created to set the security level for a user. When creating a new role there are various permissions that can be attached to that role. Each permission has its own role which is detailed below:
Change settings | This option allows the user to modify the settings of the SmartIQ site. When this permission is set to a user, that user will be able to see the settings menu in manage and can modify them. These permissions are best set for a role that only needs the ability to modify settings in manage. |
Content approver | This option allows the user to approve changes to the content items in the content library. This role only applies when “Enable Content Approval” is enabled in settings.
|
Design projects | This option allows the user to create projects in design as well as publishing those projects to folders. This permission is best set for a role that only needs the ability to run SmartIQ design application. |
Licensing | This option grants permission to modify your SmartIQ licensing configuration. |
Manage Content Library | This option allows the user to add and delete content library items. When this permission is set to a user, that user will be able to see the content library menu. This permission is best set for roles that need the ability to manage the content library. |
Manage data sources | This option allows the user to create, edit or delete data sources. When this permission is set to a user, that user will be able to see the data sources menu. This permission is best set for a role that needs the ability to modify the data sources. |
Manage Groups | This option allows the user to create, edit or delete groups. When this permission is set to a user, that user will be able to see the Groups menu. This permission is best set for a role that needs the ability to modify the groups in manage. |
Manage Security | This option allows the user to create, edit or delete Roles which can be used to set the security for users. When this permission is set to a user, that user will be able to see the Roles menu. This permission is best set for a role that needs the ability to modify roles. |
Manage Users | This option allows the user to manage the users for the environment. When this permission is set to a user, that user will be able to access the Users menu. This permission is best set for a role that needs the ability to manage the users for the SmartIQ environment. |
Manage Workflow Tasks | This option allows the user to manage the workflow tasks for the SmartIQ environment. This is where you can view all workflow tasks as well as terminating and reassigning those tasks. This permission is best for a role that needs to manage the workflow. |
Management Console | This option allows the user to view the management console. This permission is best set for a role that needs the ability to view the management logs in manage. |
Publish Projects | This option allows the user to manage folder access and publish projects. This permission is best set for a role that needs the ability to manage the folder access and can edit projects. |
View event log | This option allows the user to view the logs for the different events that may occur. This role is best set for a user that needs to ability to view and troubleshoot errors in the system. |
Management

Event Log
The Event Log menu displays event log messages specific to the current tenant and only users with the "View event log" permission will have access to the Event Log.
To ensure separation of access for cloud tenants, these logs will be encrypted in the database as it may contain information that should not be visible to the cloud database admins. Additionally, logs that are not tenant specific will show empty GUID Business Units (00000000-0000-0000-0000-000000000000).
A new endpoint to retrieve Event Log messages under Admin is also available in swagger.
Workflow
Workflow LicenseContact your sales representative if you are interested in obtaining a valid Workflow licence key for your SmartIQ instance.
Following each workflow task, there is an option that allows the task's history to be viewed. A column is available with a history icon:

Click on this icon to display the Task History screen

The following information is now available for each transition of each task:
- State
- Date Created
- Assigned To: (Group name / Full User name / Username)
- Date Completed
Licensing
The licensing section is the overview of what licensing your company holds. In order to add new licenses, you need your Tenancy Key. Use the Copy to Clipboard button to copy your key and send it to your SmartIQ representative if new modules are needed.
From this page you can tell the following information at a glance:
License Type
User Licenses: how many you have/how many are in use.
Mobile App User Licenses: how many you have/how many are in use.
Anonymous Project Licenses: how many you have/how many are in use.
Authenticated User Project Licenses: how many you have/how many are in use.
You can also view what Modules you currently have in place.
Demo and Test Licenses
If you have a demonstration or test license, there will be a message at the top of any form in Produce indicating it is for "demonstration" or "test" purposes only. There will also be a stamp on generated documents.
Availability:
- Excel
- JSON
- PDF generations
- PowerPoint
- Text
- Word
- XML
NoteFor all Microsoft outputs, the resulting document will be read only.
Generated Documents Stamp
Allows user to define a customized stamp

Below is the generated output document with stamp.

Generated Documents Stamp is available only for Standard/ Transactional licences
Availability:
- .docx
- .pptx
Settings
General Tab

Google Tag Manager
This feature requires a new license module "Google Tag Manager".
Once the site has that license then Manage > Settings > General > Google Tag Manager Container ID will display. This allows the entry of the GTM-XXXX style code that can be retrieved from the Google administration console.

Produce will then start reporting to Tag Manager browses to Home and Forms similar to Google Analytics does.
NoteContent-Security-Policy header needs to be modified for Produce to add https://www.google-analytics.com https://www.googletagmanager.com to allow communications and js download from those sites. (See appsettings.json)
When using on a non-https site, eg localhost, http://www.googletagmanager.com also needs to be added to the CSP header.
Defaults Tab

User Profile Mapping Tab

Security Tab

Password Settings
SmartIQ provides several password settings for improving security. Different password settings are:
- Enforce Minimum Password Length – Sets the minimum length requirement for passwords.
- Lock Out Users For 5 Minutes After Invalid Password Attempts – Prevents users from logging in for 5 minutes after a number of invalid password inputs.
- Enforce Password History – Enables storing a certain number of passwords to prevent password reuse.
- Enforce Password Expiry – Enables password expiry and request password change after a certain number of days.
- Enforce Complex Passwords – Ensures that the password contains upper/lower case, digit, and special characters.Password must not contain a username and any other similar combinations of username (note that it is available from 8.5.0.25 onwards).
Retention Tab

On Premise Settings

Cloud Settings
Deployment Feature AvailabilityAll Retention settings are configurable in on-premise and private instance cloud deployments only. Multi-tenant instances have an instance level setting and tenancies in that instance are limited to configure Version History Maximum, Keep Workflow History and Store Location Data. All other settings inherit from the instance configuration.
Setting | Description |
|---|---|
Version History Maximum | Set the number of template and content versions to store before dropping older versions. It is strongly recommended that this value is increased from the default 10, especially in an environment where most form changes will be made. |
Temporary File Storage Period (Hours) | Set the time in hours to retain temporary files. This includes generated documents and uploaded attachments for submitted forms. |
Number of Downloadable Documents | Set the number of previously generated documents to store beyond the temporary file storage period. This makes the documents available at any time from the Documents area within Produce. Set to 0 to allow any number of documents to be downloadable. |
Generation Log (Days) | Set the number of days the generation log table will retain data in the database. |
Audit and Event Log (Days) | Set the number of days the audit and event log tables will retain data in the database. |
Keep Workflow History | Tick to keep workflow transition history. If this option is not enabled, only the final submitted data will be retained as per the generation log setting. |
Store Location Data | Allows all IP and location tracking and storage to be enabled. The IP lookup provider is defined in the appsettings. Note that some free IP lookup services only allow a limited number of lookups per day/hour. |
Workflow (Days) | Set the number of days the workflow history table will retain data in the database. |
Retention period changesIf retention periods are reduced, the new value will apply immediately to all existing data. At the next scheduled clean-up, all data that lies outside the new retention values will be removed.
Theme Settings Tab

To see how to use these settings, see SmartIQ Theme Settings.