Template - Power Point
Infiniti supports Microsoft PowerPoint Presentation as an output. Text and images can be inserted, removed or repeated within a slide. This feature is designed for creating dynamic PowerPoint presentations with minimal effort.
How to insert a bookmark/placeholder into PowerPoint
Infiniti 8.1+ supports tags as placeholders. A tag is a plain text placeholder name wrapped in double curly braces, {{text/image name}}. For example: {{FirstName}} {{LastName}} with a user ID of {{IDNumber}}. The new tags can be used in place of bookmarks. Tags can also be used for ‘close gaps’ and ‘repeating tags’.
To create a close gap or a repeat tag range, begin the tag name with ‘#’ at the beginning of the name and close it with the same name at the end (prefixed with a forward slash '/'). For example: {{# Points Repeat}} some normal text {{points}} more normal document text {{/ Points Repeat}}. Here, the text between {{#Points Repeat}} and {{/ Points Repeat}} will be repeated for every values for {{points}}.
To bookmark a slide
- Go to the View tab and click ‘Macros’.

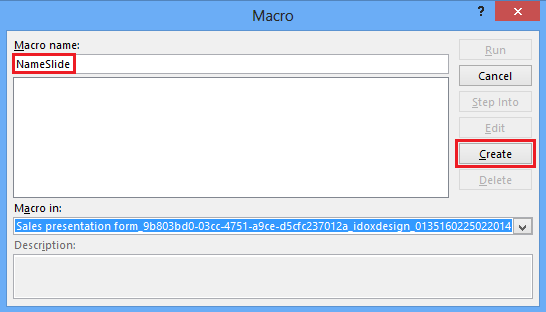
The Macros box will pop up.
- Enter the name in the Macro Name: text box (for example NameSlide) and click the
Createbutton.
The Microsoft Visual Basic Application will pop up.
- Type the following code in the given text box.
Dim currentView as Long
currentView = ActiveWindow.ViewType
If currentView = ppViewSlide Or currentView = ppViewNormal Then
  slideName = InputBox("Side Name"), "Enter the slide name", ActiveWindow.Selection.SlideRange.Name)
  ActiveWindow.Select.SlideRange.Name = slideName
Else
  MsgBox "Please selected a slide first", vbInformation
End If
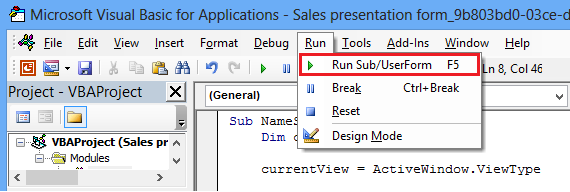
- Go to the Run tab and click
Run Sub/UserForm.
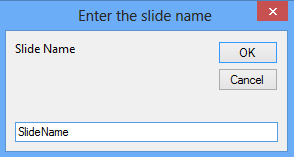
The Enter the slide name box will pop up.
- Enter the slide name in the Slide Name text box (for example SlideName) and click the
OKbutton.
Close the Microsoft Visual Basic Application and close the PowerPoint template.
How to create repeating placeholders
- To create a close gap or a repeat tag range, begin the tag name with a # at the beginning of the name and close it with the same name at the end (prefixed with a forward slash '/'). For example:
{{#Points Repeat}}some normal text{{points}}more normal document text{{/Points Repeat}}. Here, the text between{{#Points Repeat}}and{{/Points Repeat}}will be repeated for every values for '{{points}}'.
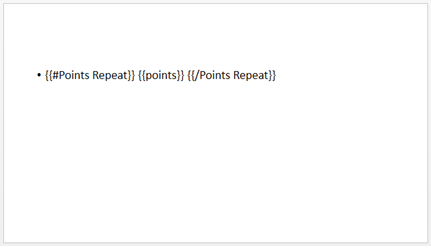
The placeholder will be available when the PowerPoint is uploaded in design. {{#Points Repeat}} is the repeating placeholder and {{points}} is the placeholder included inside the repeating placeholder. SlideName is the placeholder denoting the slide.
- Map the placeholder to the required locations and specify the repeating placeholder under the properties tab of the section/page.
NoteThe above example shows repeating points in the PowerPoint file. For repeating the slides of the PowerPoint file, replace
{{#Points Repeat}}withSlideNameplaceholder in the Placeholder(s): textbox.
How to publish a PowerPoint Project
- Open the project from Manage and click the ‘Publish’ button.

- Select the folder to which the project is to be published. Specify the output format required from the Presentation tab.
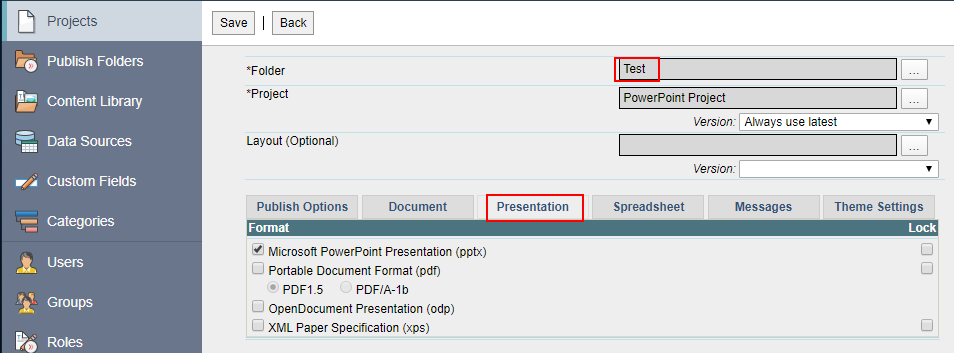
- Click the Save button.
Produce - How to run a PowerPoint project in Produce
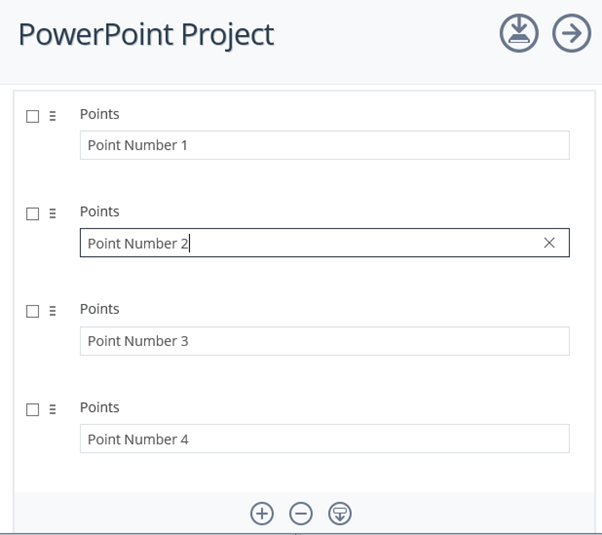
- Open the project and enter the values.
-
Click ‘Next’ and then ‘Generate Document’.
-
Open the generated document. From the above example
If the placeholder mention in the repeating placeholder section in design was {{#Points Repeat}} then the output will be a PowerPoint file with 1 slide and 4 rows.

If the placeholder mention in the repeating placeholder section in design was SlideName then the output will be a PowerPoint file with 4 slides and each with 1 row.
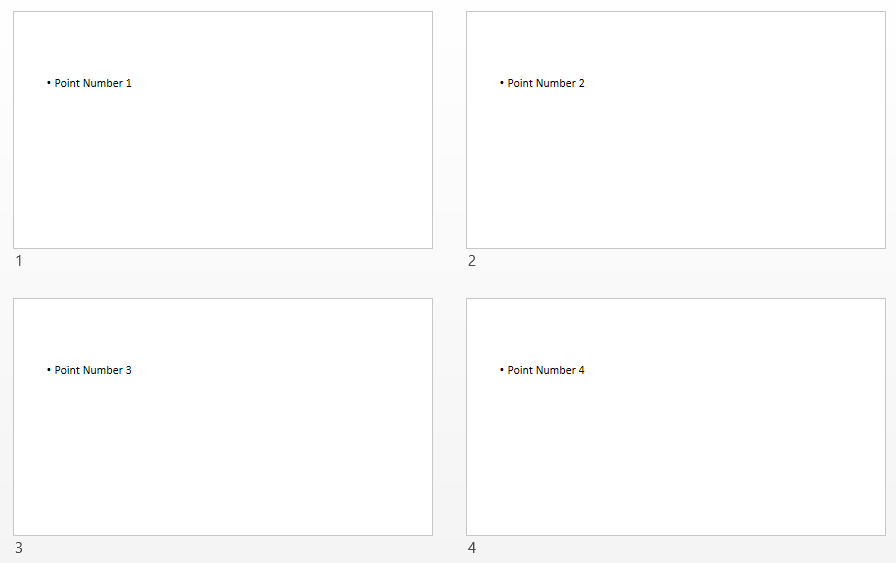
NoteYou can also use the NameSlide routine to name slides and then include/exclude the entire slide instead of just content within a slide.
Keywords: Repeating Section PowerPoint Placeholders
Updated 9 months ago
