
Creating your first SmartIQ project
How to create a SmartIQ project
Getting Started
Welcome to SmartIQ! This document will guide you through the process of creating a simple SmartIQ project.
In order to complete this project, you will need these prerequisites:
- Any supported browser
- Microsoft Word
When the project is complete, you will have made an SmartIQ project that allows users to answer a question which will dynamically edit a document.
Creating your first SmartIQ project
Creating the Template
- Before we start creating the SmartIQ project, we need to have a word document to use. Create a Word document which should look like this:

- Save the letter to your computer as a Word document. For this example, save as New Print Run Letter.
- Open up the letter in Microsoft word.
- Add two curly brackets ‘{{word}}’ around the words which are coloured in as red. Doing this turns these words into something called placeholders. The colour of these words does not matter when turning them into placeholders.
For SmartIQ to interact with the word template, you need to first define placeholders. Placeholders define a location within the template document that SmartIQ will either Insert data into or apply logic to a location/range within the word template.
There are two types of placeholders, the first is an Insertion Placeholder and the second is a Selection Placeholder:
- Insertion Placeholder
Defined by Project Designers by inserting two open curly brackets ‘{{’ and two closing curly brackets ’}}’ into a location within the template, e.g.: {{Insertion_Placeholder}}. This type of placeholder will be replaced with the data returned from the question set. The image below is what the document should look like if the insertion placeholders were correctly placed.

- Selection Placeholder
Defined by Project Designers by inserting an open tag with a ‘#’ to specify the start of a range ‘{{#SelectionPlaceholder}}’ and a closing tag with a ‘/’ to specify the end of a range within the template ‘{{/SelectionPlaceholder}}’. This type of placeholder defines a range (section, text or page(s) of the document) to be inserted, removed or repeated within the template. The image below is an example of how selection placeholders are placed.

The name of the placeholder applied is the text within the open ‘{{’ and closing ‘}}’ curly brackets. For example, the name of a placeholder, in this case, will be Name.
If your placeholder names contain multiple words it is suggested that you use underscores instead of spaces as shown here: Customer_Name_2. It is advised to name your placeholders in accordance with the data being inserted, removed or repeated. This will help you easily recall which placeholder refers to a specific location.
Leave any punctuation or spaces around the placeholder.
Now that the place for your dynamic content has been held, we can create the Question Set that will ensure the right information goes in that place later. Make sure you save the changes you have made to the letter.
- Now that the document is ready, it’s time to start SmartIQ Design.
Creating the project and Question Set in Design
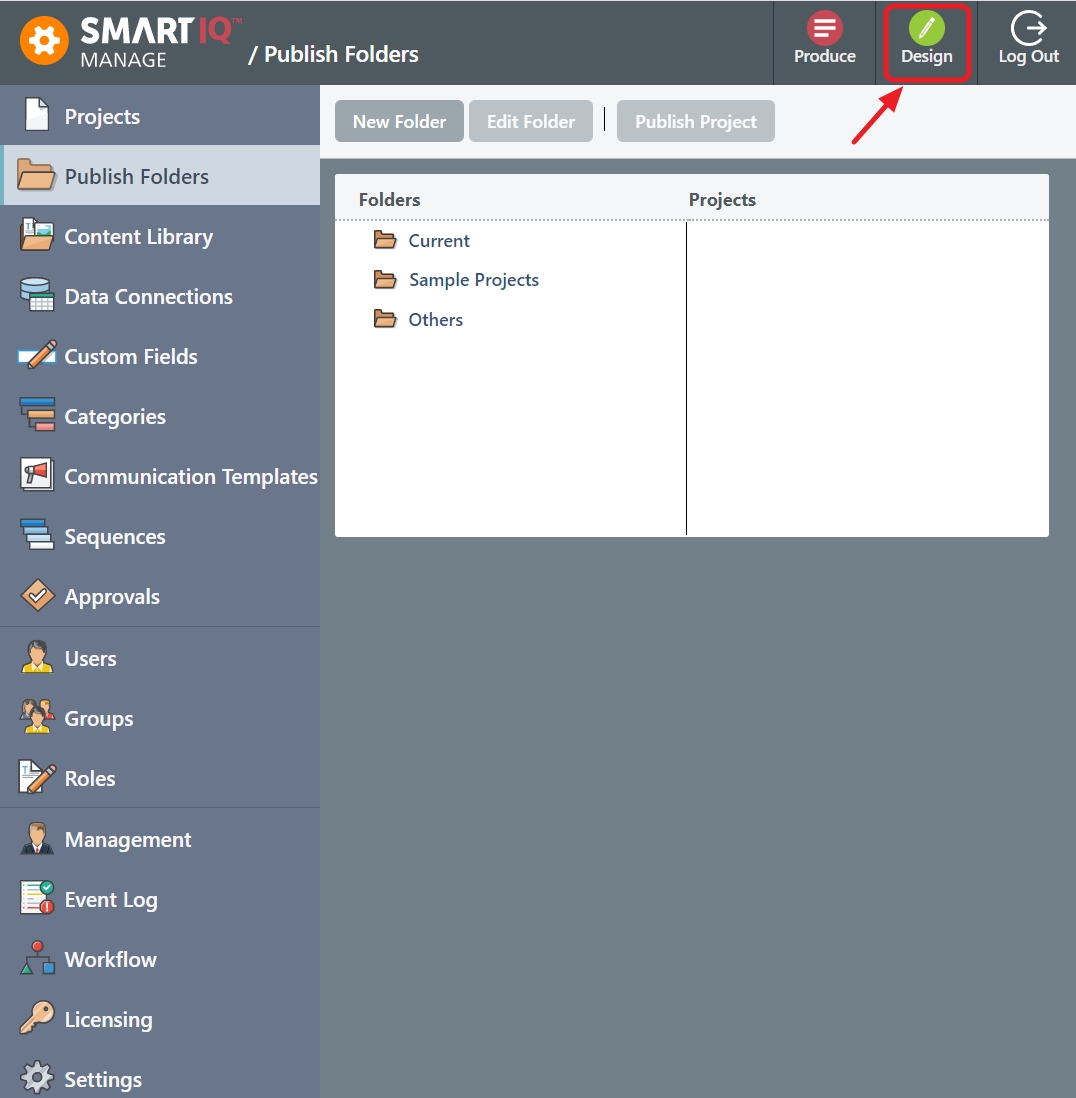
- From Internet Explorer**, navigate to Manage and click the menu item labeled ‘DESIGN’ on the top-right navigation pane. Please ensure you are using the latest version of Internet Explorer for best results.
NoteClicking it will open the web design tool start-up screen (image below). Please take into consideration that new capabilities are being added to it regularly.

- Click Create new project. The NewSmartIQ Project dialog displays.
- Give your project a name and leave the type as ‘Form’
- Click OK to start your new project.

The Design main screen depicted below is where you will create your Question Set. Question Sets have different:
- Layout types
- Question types
- Answers
- Placeholders
These are explained throughout this guide. For now, we will focus on simply creating the right Question Set for our particular example.
In the middle top of the form, there are several tabs with sub-headings: Common, Layout, Questions, Templates, and All. We will use these items under these tabs to construct our Question Set.

- By default, you will have a page with the heading New Page 1. At the right in the Page Properties tab, rename your page in the ‘Page Title’ variable. Call it New Print Letter.

- From the top tab ‘Common’, click and drag a Text Field question and drop it onto New Print Letter within the question set. Note that there are many different question types, each with its own behavior and purpose.

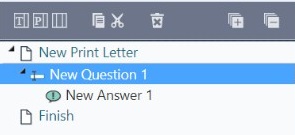
A new question has now been added along with a new answer, called New Question 1 and New Answer 1 respectively
- Click to select the question and in the Properties tab, change the Question Text to Enter Customer Name.
This will be the question’s wording displayed in Produce. For this scenario, leave all other fields to their default values, or blank.’

Answers can be thought of as the user’s response to the question, and in the Question Set, they allow you to provide default values and control the format of the response.
- Click on the ‘New Answer’ at the left side panel. Then Click in the Answer Properties tab on the right panel, find the ‘Answer Name’: variable and rename your answer to Customer Name Answer.

- Insert your tutorial document into the project.
You will need the New Print Run Letter document to use as a template for your project.
- Click the Templates tab at the top of your form and select the format of your document to begin upload. Please select Word. And upload the New Print Run Letter document.

- Link your placeholder to the answer.
Now we will add the placeholder to the question set, in the Customer Name Answer, ensuring the answer appears in the correct place in the document.
- Click the Customer Name Answer
- In the right pane, click the Placeholders tab.

-
Click New Print Run Letter expand button, to expand the document name, in our example New Project, to reveal a list of placeholders in the document.
-
Drag and drop the placeholder name, {{Name}} onto the Answer in the Question Set pane.

The Question set should now look like this:

- Click to save the project to the database. Call it New Print Letter.

- Now we are going to publish the project in Manage.
The remaining steps to publish the project and generate a document are not part of Design, but are included here to cover the entire process.
Publishing the Sample
- Open Manage and log in via your internet browser. Make sure you create the folder in Publish Folders tab on the left pane.
- Create a folder called ‘Tutorial’ to publish the project, if one doesn’t already exist.

- Navigate to the Projects screen and click in the project name New Print letter from the list of projects.

- From the menu along the top of the screen, click Publish.

- Click (...) to select the folder to which you wish to publish the project, then click Save.

Generate the Document in Produce
- Navigate to Produce from the top right-hand corner of the page.
- Find the New Print Letter project under projects and click to run it.

- The project’s only question will display asking you to enter the customer’s name. Do this and proceed by clicking Submit.
This will generate the document

- When the document has been generated, click link(s) to download and/or open the document.

- Confirm that SmartIQ has placed the customer’s name you typed earlier into the appropriate part of the document.

If you would like to finish this document, you can add in a Text Field for Date and Days and drag the associated place holders onto the answers. You can even make sure a date or a number is answered by clicking on the Text Field and on the properties tab, change the Data type to whatever is required.

Practice with SmartIQTesting is an important part of the SmartIQ project creation process. We recommend to customers that they create and modify projects in a separate SmartIQ environment not accessible to end-users.
Updated about 1 year ago