PDF Stitch
Overview
The PDF stitch action concatenates a collection of individual documents sourced from distinct locations into a single PDF document. The action takes responsibility for PDF conversion to take place, allowing images and word documents to become part of the concatenated PDF too.
Features Included:
-
Combine two or more pdf, doc, docx, jpg, gif or png files into forming a single pdf document.
-
Allows the concatenated document to be named appropriately.
-
Provides an order to the question set chosen such as file selection.
How to configure the PDF stitch action
-
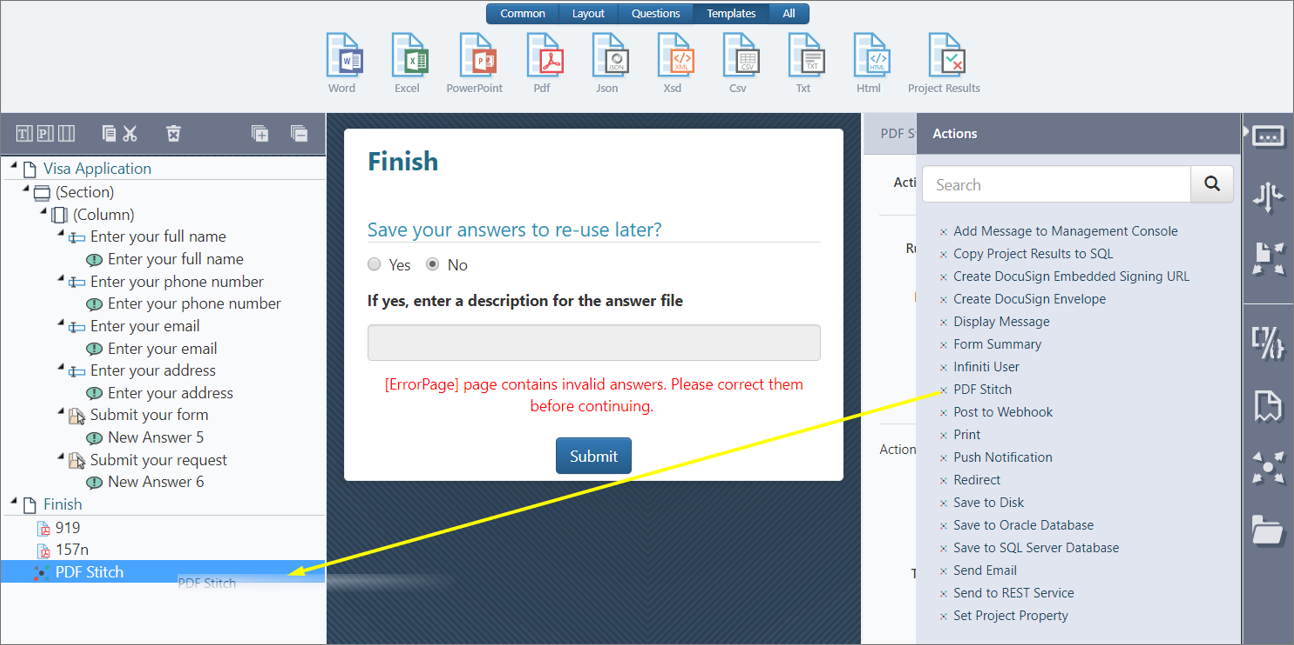
Open a project with at least two documents, the example below already has upload questions and generated documents.
-
Drag and drop a PDF Stich action onto the Finish Page.

- Configure the actions properties as described in the table below by clicking the properties tab.
Action Attributes | Description |
|---|---|
Generate Order | Allows the PDF and Word Documents to be merged into a single PDF document; based on the logical order in which the documents have already been uploaded onto the Finish Page. As a result, the order of documents in the generated result will simply be arranged based on the documents which have been attached on Design from top to bottom. Therefore, the PDF Stitch will also process this order into integrating the documents from top to bottom. However, it is also possible to type in the document names in the Text Value box by just adding commas between the document names such as d1, d2, d3, … |
Question Order | Enables the user to have the uploaded attachments in the form to also be merged into a single document which can be generated by typing in the question order within the Text Value box as you can see in Figure. 2 |
Stitched Document Name | Gives a specific name for the generated document. The given name can also be typed in within the Text Value box. Therefore, it will name the stitched PDF. |
NoteThe PDF stitch action has two inputs for sorting, one for templates (Generate Order) and one for attachments (Question Order). Generated templates are always ordered first in the list and then attachments as a group after that in order if specified.
- Select Generated Order.
- As you can see below, you are able to set up the order to documents when uploading them onto your Finish page. By choosing this option; SmartIQ will simply enable the documents to run in a logical order. That being said; this order will be set as default.
- You can also type in the name of documents in the Text Value as you wish. This will allow you to change the order by choosing which document you want in order to be structured in your Stitched PDF.
- Once the first option is selected; ensure to click “Add” so that the document can generate the inputs selected.
- Select the Question Order.
- You can either type in the Question ID of the two File Selections as shown in Figure 1 or you can simply use the question reference tool in order point out the order.
- Select Stitched Document Name.
- Simply type in the appropriate name that you wish to choose for your Stitched PDF document.
- Save and publish your project to produce.
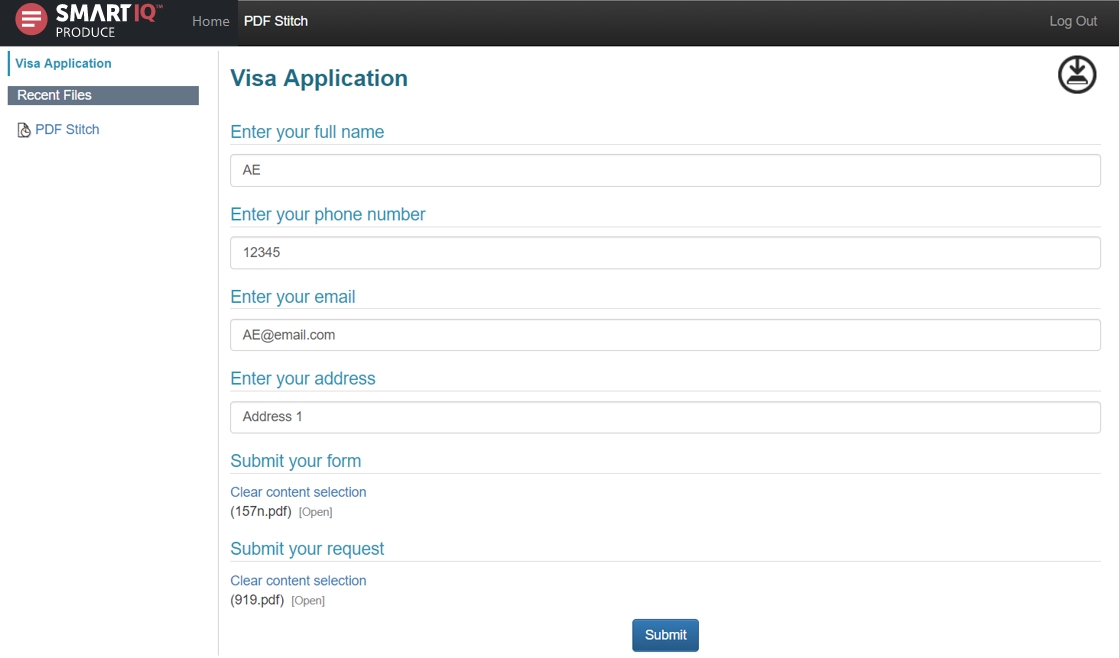
- Upload your new documents.
Your form in Produce should look like as the following:

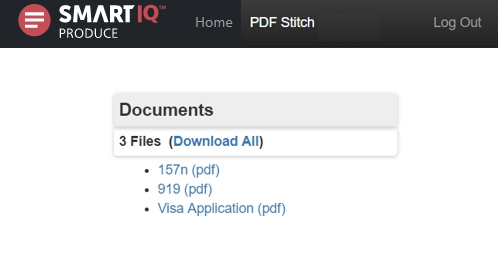
- Click submit to run your project and check the generated ‘Stitched’ PDF’ in which you have named the Stitched Document as “Application Visa”. As you can in the following; you all the four documents are available; and the Visa Application includes all the documents embedded in a single document.

Note: you can be able to set up the three action inputs together or separately within your generated form in any way you wish your forms to be stitched. However, you only have the chance of using each input once.
Updated 9 months ago
