SmartCOMM Action
Overview
Use this action to submit data for further processing or to generate a document in SmartIQ using SmartCOMM Data Modal and Template Selector.
NoteContact your sales representative if you are interested in obtaining a license for the SmartCOMM action for your SmartIQ instance.
SmartCOMM Configuration Settings
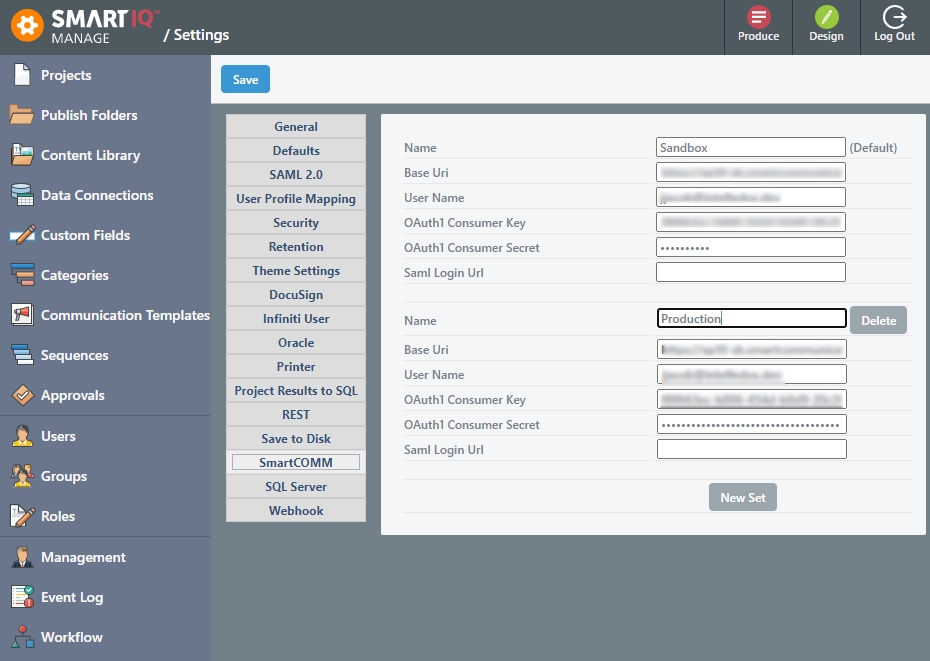
- Obtain a license for the SmartCOMM action and configure the default values for SmartCOMM in Manage > Settings > SmartCOMM.
- Base Uri (Required) – SmartCOMM Pure Cloud tenancy Uri. This will be of the form
https://<server>.smartcommunications.cloud/one/ - User Name (Required) – The username for the SmartCOMM account to be used.
ImportantView the Consumer Key and Secret values from the SmartCOMM account setup under Settings > Security > View API Keys. These are used to gain administrator access to the application, therefore, only share this information with the required users.
- Name – Specify a name
- OAuth1 Consumer Key (Required) – The public key needed to sign messages when accessing the cloud. Ensure the signature method is HMAC-SHA256.
- OAuth1 Consumer Secret (Required) – The private key needed to sign messages when accessing the cloud.
- SamlUrl – This is the Saml Authentication URL from the SmartCOMM instance. This is optional but highly recommended to be able to seamlessly use Single sign-on for the SmartCOMM integrations. If SAML is not enabled, the SmartCOMM logon page will appear every time SmartCOMM application page is opened from Produce.
- Appliance Uri – The optional Appliance Uri directs generation tasks to the appliance for processing. This will be of the form:
https://<yourserver domain>/smartcomms. As this is a system to system integration, ensure that the SmartIQ server trusts the SSL certificate that the appliance is serving.
- For multiple SmartCOMM accounts:
- Click the New Set button to configure additional SmartCOMM accounts. For example, Sandbox and Production.
- Click the Set as Default button to change the default set. If the previous Default was set in Design, SmartIQ will now use the new Default values.

- Click Save.
Usage
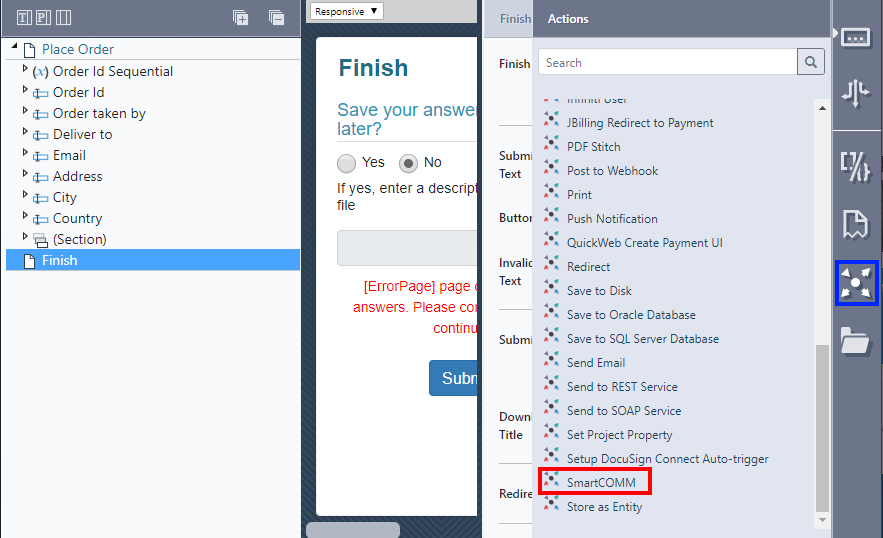
- In Design, open a project and use the actions icon to show the Actions panel.
Draft Editor QuestionUse Draft Editor Question to customize the fields and content within the editor.
- Drag and drop the SmartCOMM action onto the Finish section.

Once selected, the following action is displayed for configuration:

-
Use the right-hand panel and check the configured SmartCOMM account. If there are multiple accounts, select the account to use from the drop-down list.
-
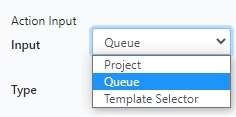
Select the required inputs and configure them accordingly.

Inputs
| Input | Description |
|---|---|
| Project | Select the name of the SmartCOMM project that contains the data model and template selector. |
| Queue | If a value has been selected from the drop-down list of available job queues, SmartIQ will call the SmartCOMM SubmitJob Asynchronous API and no document will be generated or returned to SmartIQ. |
| Template Selector (Required) | The SmartCOMM template selector that will be used to generate the required document. |
- Add the Data Model and the corresponding placeholders to the answers.
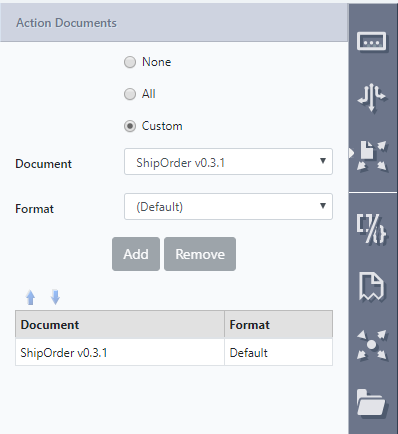
- Select the SmartCOMM action and the Documents option on the right hand of the screen.

- Select the Custom option and select the Data Model and format from the drop-down lists.

Now when you run the project, the Data Model will be filled according to the answers matched to the placeholders. This will then be supplied to the Project and Template Selector specified.
Updated 9 months ago
