
File Transfer (FTP/SFTP) Action
The File Transfer (FTP/SFTP) Action grants designers the ability to transfer generated documents from SmartIQ to a remote server via Secure File Transfer Protocol.
Default Connector Settings
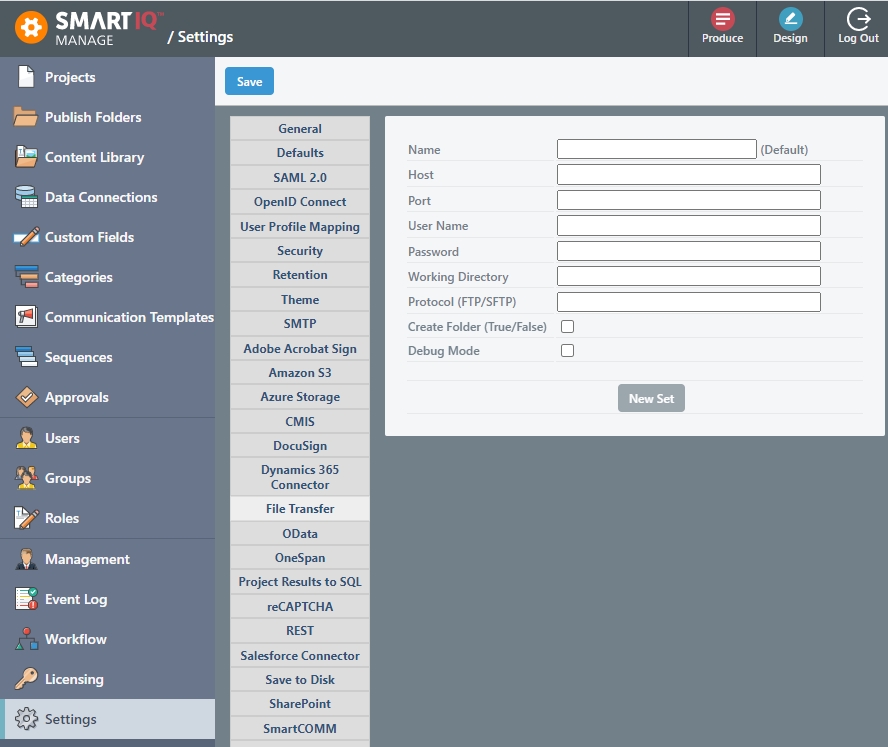
Add the File Transfer Settings in Manage > Settings > File Transfer.
The following attributes are mandatory and must be added to any File Transfer (FTP/SFTP) action for it to function correctly.
Attribute | Description/Value |
|---|---|
Default Host | IP Address of the remote server you are going to transfer documents to. |
Default Username | Username to login to that server. |
Default Password | Password to login to that server. |
Default Working Directory | The particular directory in that server that you want to documents to be transferred to (e.g. /upload). Please note that if there is no particular directory you want to upload the documents to, “/” should still be entered. |
Default Port | For SFTP transfer, the default port will always be 22. For FTP transfer, the default port will always be 21. |
Default Protocol [FTP/SFTP] | Specify the sending option, either “sftp” or “ftp”. |
Default Create Folder [True/False] | Specify whether you want to Working Directory above to be created or not. Either “True” or “False”. |
Multiple AccountsClick the New Set button to create additional accounts. For example, Sandbox and Production. Additionally, click the Set as Default button to change the default connector set. If the previous Default was set in Design, SmartIQ will now use the new Default connector values.
Action Properties
Adding File Transfer (FTP/SFTP) Connection Settings through Action Properties in Design.
WarningThe Connection Settings added through Action Properties in Design will NOT change the Default Connection String to be used for every project.
- Add an Action to the Finish Page. Refer to Add an Action
- Select the File Transfer action from the Type dropdown list and press OK.
- The File Transfer action will now be added to the finish page of your project.
- Select the File Transfer (SFTP) action on the finish page.
- Ensure that the Properties tab is selected.
- Under the Action Attribute section, select an Attribute to assign a value to.
- After selecting an Attribute, select a Type
The following are possible attribute types for the Send Email action:
| Attribute | Description/Value |
|---|---|
| Answer Value | The value of an Attribute can be populated from the answer field of a Question such as a Text Field, Variable, etc. |
| Data Question | The value of an Attribute can be populated from the data fields within a Data Source. |
| Fixed Value | The value of an Attribute can be set to a fixed, predetermined value. Note: Question references are supported within Fixed Value answers. |
- Each Attribute must be added one at a time by selecting the Attribute, selecting a Type, setting or selecting a corresponding Fixed Value / Question and Answer, and then pressing the Add button.
- The properties tab should resemble below:
- Conditions may also be set on the File Transfer (FTP/SFTP) action through the Conditions tab. Refer to Defining Conditions.
Run your project in produce, after the documents being generated, they will be transferred to the remote server.
Updated about 1 year ago