
OData Connector
OData ModuleContact your sales representative if you are interested in obtaining a license for the OData module for your SmartIQ instance.
Overview
Create a new Data Connector in SmartIQ to consume RESTful APIs using the OData version 4 protocol.
Setting Up
- Open the SmartIQ Manage application and log in as an Administrator with Change settings permission.
- Configure the default values in Settings > OData.
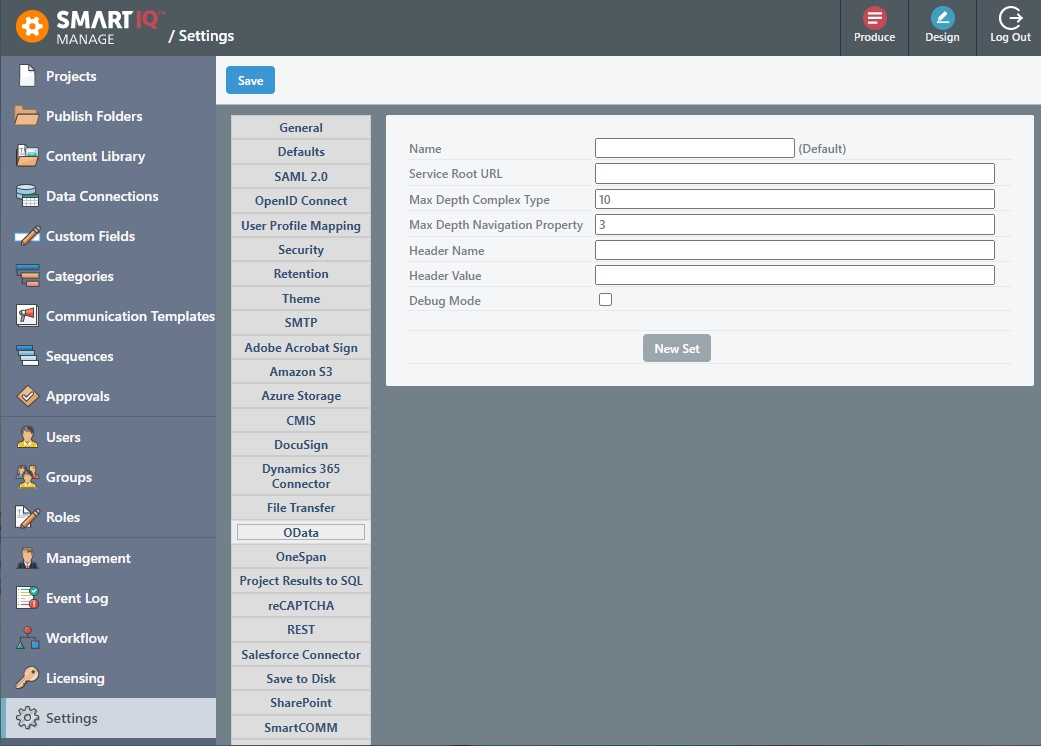
Setting | Description |
|---|---|
Name | Specify a name. |
The service root URL identifies the root of an OData service. The metadata can be found by appending $metadata to the service root URL. | |
Max Depth Complex Type | The amount of recursion within nested Complex Types. This number can be overwritten for a specific data connection within. The default value is 10. |
Max Depth Navigation Property | The amount of recursion within nested Navigation Properties. The default value is 3. |
Header Name, Header Value | Adds an additional header to the request when querying the OData service. |
Debug | If enabled, will log schema discovery, query entities, and filters that can be found in Manage >Event Log. |
- (Optional) For multiple OData accounts:
- Click the New Set button to create additional accounts. For example, Sandbox and Production.
- Click the Set as Default button to change the default connector set. If the previous Default was set in Design, SmartIQ will now use the new Default connector values.
- Click Save.
Setting Up the OData Data Connection
-
Go to Manage > Data Connections > New Data Connection and select OData Connection Type from the drop-down menu.
-
In the New Data Connection screen, configure the following:
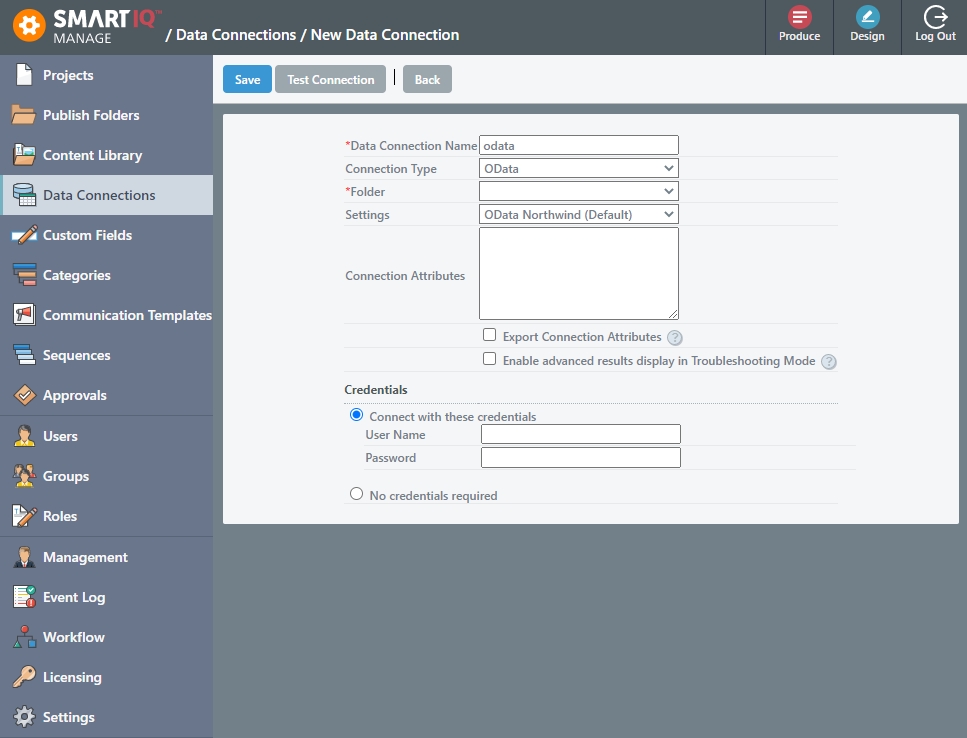
- Specify the name of the data connection and select OData as the Connection Type.
- Select the OData setting from the drop-down menu.
- In Connection Attributes, specify values that will overwrite a specific setting for a particular data connection. For example,
serviceRootURL=https://services.odata.org/Experimental/Northwind/Northwind.svc;maxNavigationDepth=3;maxComplexDepth=5;If left blank, the data connection will use the values configured in Manage > Settings.
AuthenticationOData supports username and password authentication as well as bearer tokens. To use a bearer access token, add a
bearer=[AccessToken]as a parameter in the Connection Attributes and set the Credentials to "No credentials required".
- Configure the Credentials.
- Click Test Connection to verify connection with the endpoint.
- Click Save.
Setting Up the Data Objects
- Click New Data Objects and start typing the data object name and you will get an auto-complete of the available objects. Select the one you want.
- Specify a display name.
- Click Save.
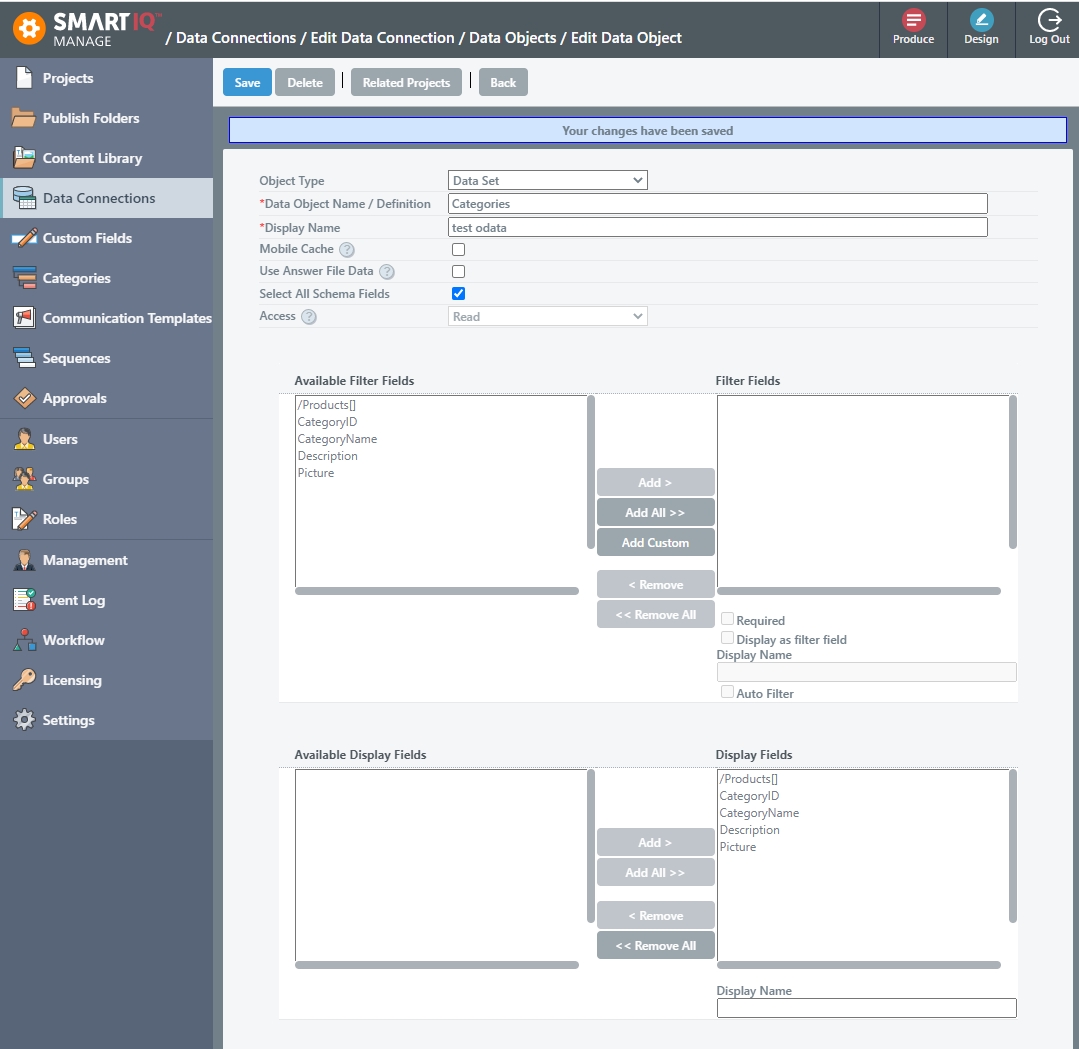
- Configure which fields are available to be filtered and displayed within Design.
Notes
- Fields that start with a forward slash / indicate that it's a navigation properties on the field. Navigation Properties can be nested down to the maxNavigationDepth. For example,
/ProductDetails/Product/Supplier.Name- Fields separated with a period(.) indicate a complex type. For example,
Address.State, Address.City, Addresss.Street- Fields that end with square brackets [] indicate a collection and can be set up as a hierarchical data structure.
Updated about 1 year ago