SMTP Configuration
To configure SMTP in SmartIQ, you need to make the modifications in Manage, Produce and/or Scheduler configuration files.
UpgradeIf upgrading from SmartIQ version 12 or older, the system will automatically copy the web.config settings to the appsettings.json file and no further actions need to be done.
On-premise/Hosted Environments
For on-premise, manually change the settings on the appsettings.json file on the Produce folder. For private, hosted environments, contact SmartIQ support with the SMTP settings that have to be changed.
Configuring SMTP settings
- Go to the Produce folder and open the appsettings.json file.
- Search for the SMTP string. You should see the following default settings if your environment has not made any changes to the SMTP settings.
"Smtp": {
  "DeliveryMethod": "Network",
  "Host": "127.0.0.1"
}- Change any of the following settings and save the file.
"Smtp": {
        "DeliveryMethod": "SpecifiedPickupDirectory",
        "Host": "localhost",
        "Port": "25",
        "EnableSsl": "false",
        "Username": "<your SMTP username>",
        "Password": "<your SMTP password>"
        "PickupDirectoryLocation": "c:\\temp\\mails",
         "UseDefaultCredentials": "true"
    },
SendGrid Settings
SMTP settings for SendGrid are also in the appsettings.json file.
"Smtp": {
        "DeliveryMethod": "Network",
        "Host": "smtp.sendgrid.net",
        "Port": "587",
        "Username": "<your SMTP username>",
        "Password": "<your SMTP password>"
    },
Best PracticeIf you are using SendGrid, use the API Key method to send SMTP where the username will be "apikey" and the password will be the generated API Key from SendGrid.
Scheduler
Open the appsettings.json file present in the SmartIQ Scheduler folder and follow the steps above.
Multi-Tenant Cloud Environments
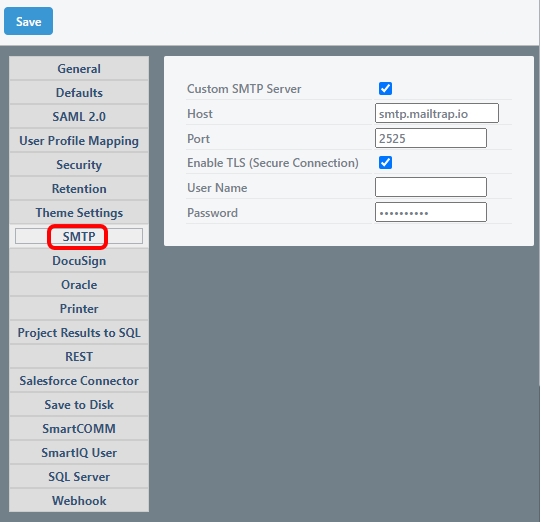
For those using multi-tenant cloud environments, configure the SMTP settings from the Manage dashboard.
- Go to Manage > Settings > SMTP.
- Change the settings.
- Click Save.

Updated 9 months ago
