Data Modals
Configuring Data Objects used In Form
Data modals open a dialog to add, edit or delete records from a Data Connection independent from the in progress form. Changes are committed immediately upon saving.
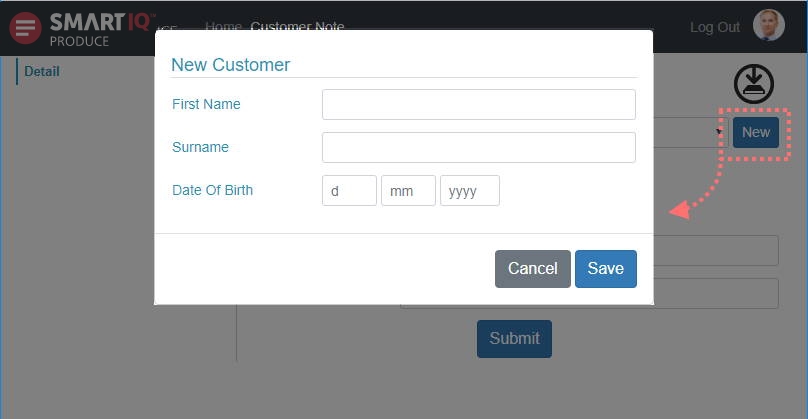
To configure the in form data writes, two core steps need to occur:
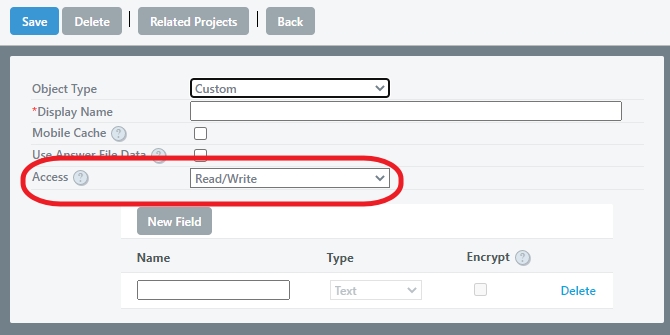
- Create a Writable Data Object with Read/Write Access that can be used across multiple forms.
- Configure your form to call upon the data modal where appropriate.
Creating a Data Modal Project
A data modal project is essentially a form with questions appropriate to a record within a data connection. Modals appear blank when creating new records or pre-populated when editing an existing record.
With your writable data object configured in Manage, open Design and click Create new project, give it an appropriate name and select Data Modal as the project type. Drop downs for which writable data object this modal should target will appear.
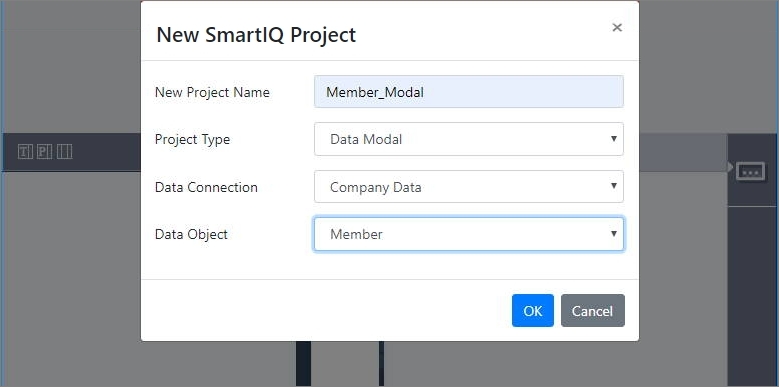
Data Modal projects target a particular writable data object
Design will open and features appropriate to the Data Modal Projects will appear. Note the placeholder fly-out will be populated with the writable data object's fields.
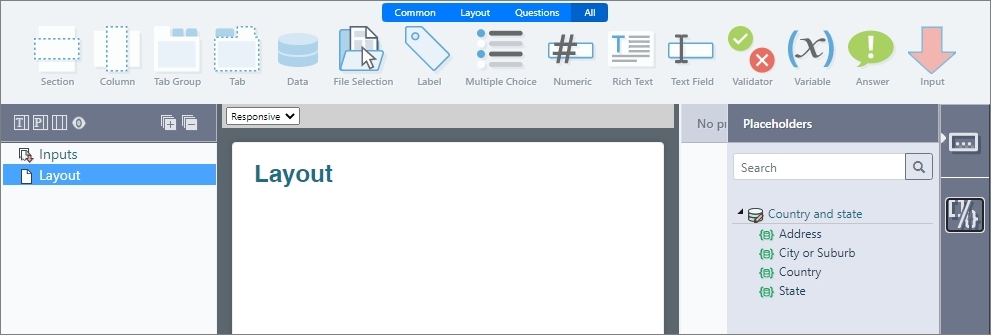
A data modal's placeholder's tab reveals the fields of its writable data object.
Drag and Drop questions appropriate to the data object. More information about data types and appropriate questions can be found here.
Screen SizeData Modals appear in a small screen in the foreground of the form. Do not over clutter the questions left to right.
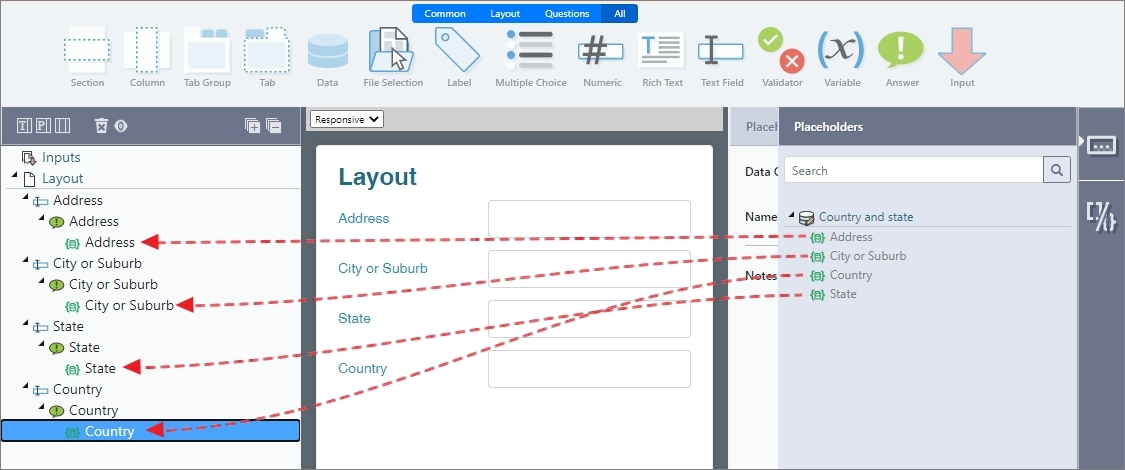
Map the writable data object's placeholders to appropriate question types
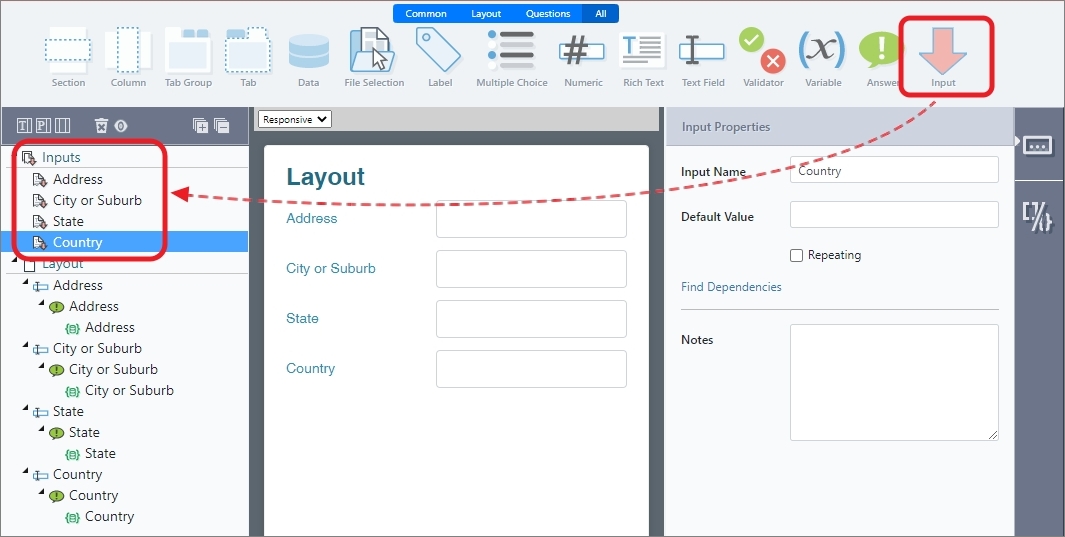
Optionally add Inputs to your modal.
Data Modal Conditions
Conditions gives the ability to hide and/or display questions based on user responses. This dynamic process is configured using "conditions", which are defined on individual questions or on a whole page. The Data Modal Mode conditions can be configured within the Data Modal form. For more information on form conditions, refer to Conditions.
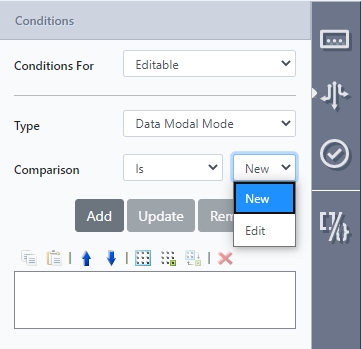
Data Modal Mode Type works with conditions as an optional feature where you can hide and/or display fields based on whether the current data modal is editing an existing record or creating a new one.
The new condition uses an is Comparison to “New” or “Edit” values as depicted in the attached screen shot.
An example scenario can be if the form is being used for a purchase request.
Field | Description | Conditions |
|---|---|---|
Name | Visible/Editable only for New | Condition for “Editable”, Type “Data Modal Mode” Is “New” |
Purchase Request ID (Sequence variable) | Visible only for Edit, Non-editable |
|
Purchase Date | Visible/Editable only for New | Condition for “Editable”, Type “Data Modal Mode” Is “New” |
Purchase Item | Visible/Editable for New and Editing | (no conditions) |
Amount | Visible/Editable for New and Editing | (no conditions) |
There are more scenarios and other combinations of Conditions that can be used to suit your specific forms.
At this point the modal is ready for use, however is not called upon by any forms, this next step is described in the section below.
Adding Data Modals to Forms
With a data modal prepared, open an appropriate form and select the data question for which the modal is to be attached to reveal its properties. The data question will need to target the same data object as the modal, essentially resulting in an onscreen list of the existing records and utilizing the modal to add and maintain existing.
Find the modal drop down and select an existing data modal. The list will be filtered to modals of this data object.
After selecting the Modal you will be prompted for an (optional) title and what tasks you want to allow users to perform.
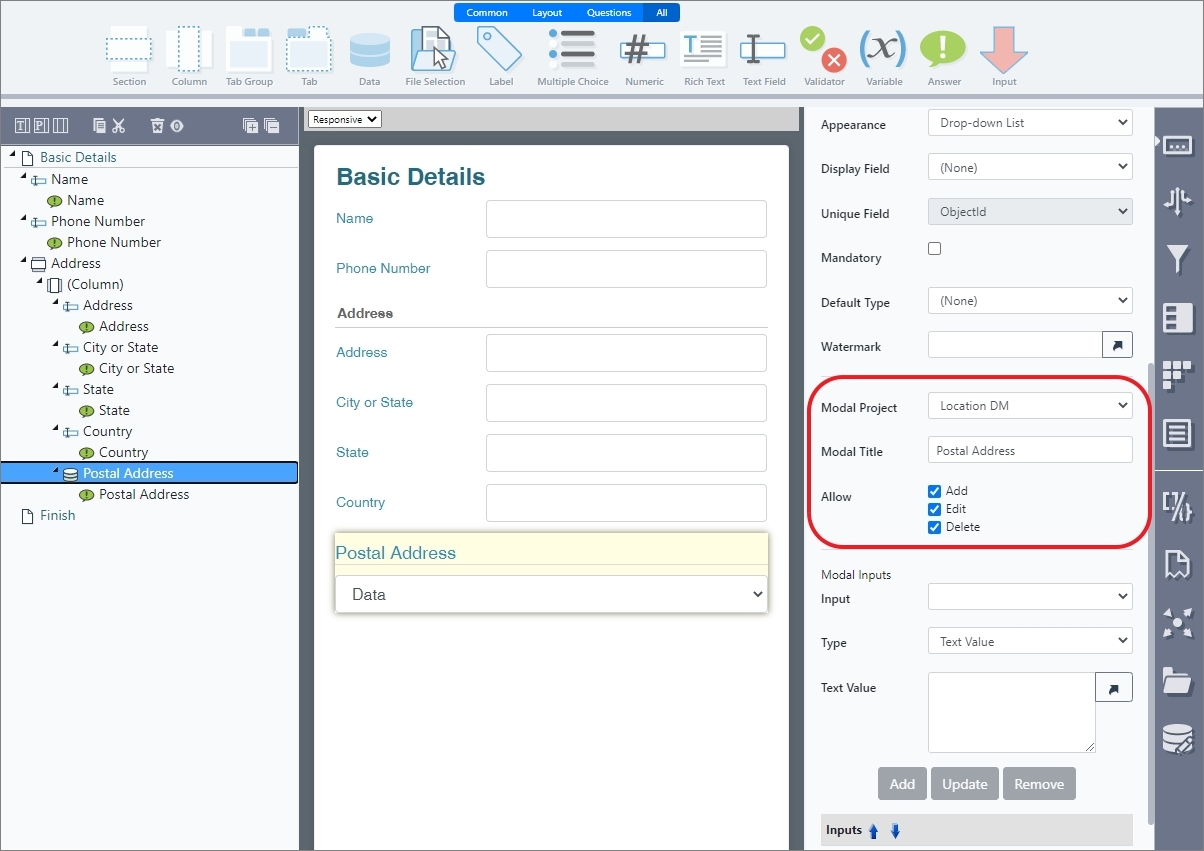
Select and configure a modal for the data question.
(Optional) If inputs have been configured, add appropriate references to the inputs.
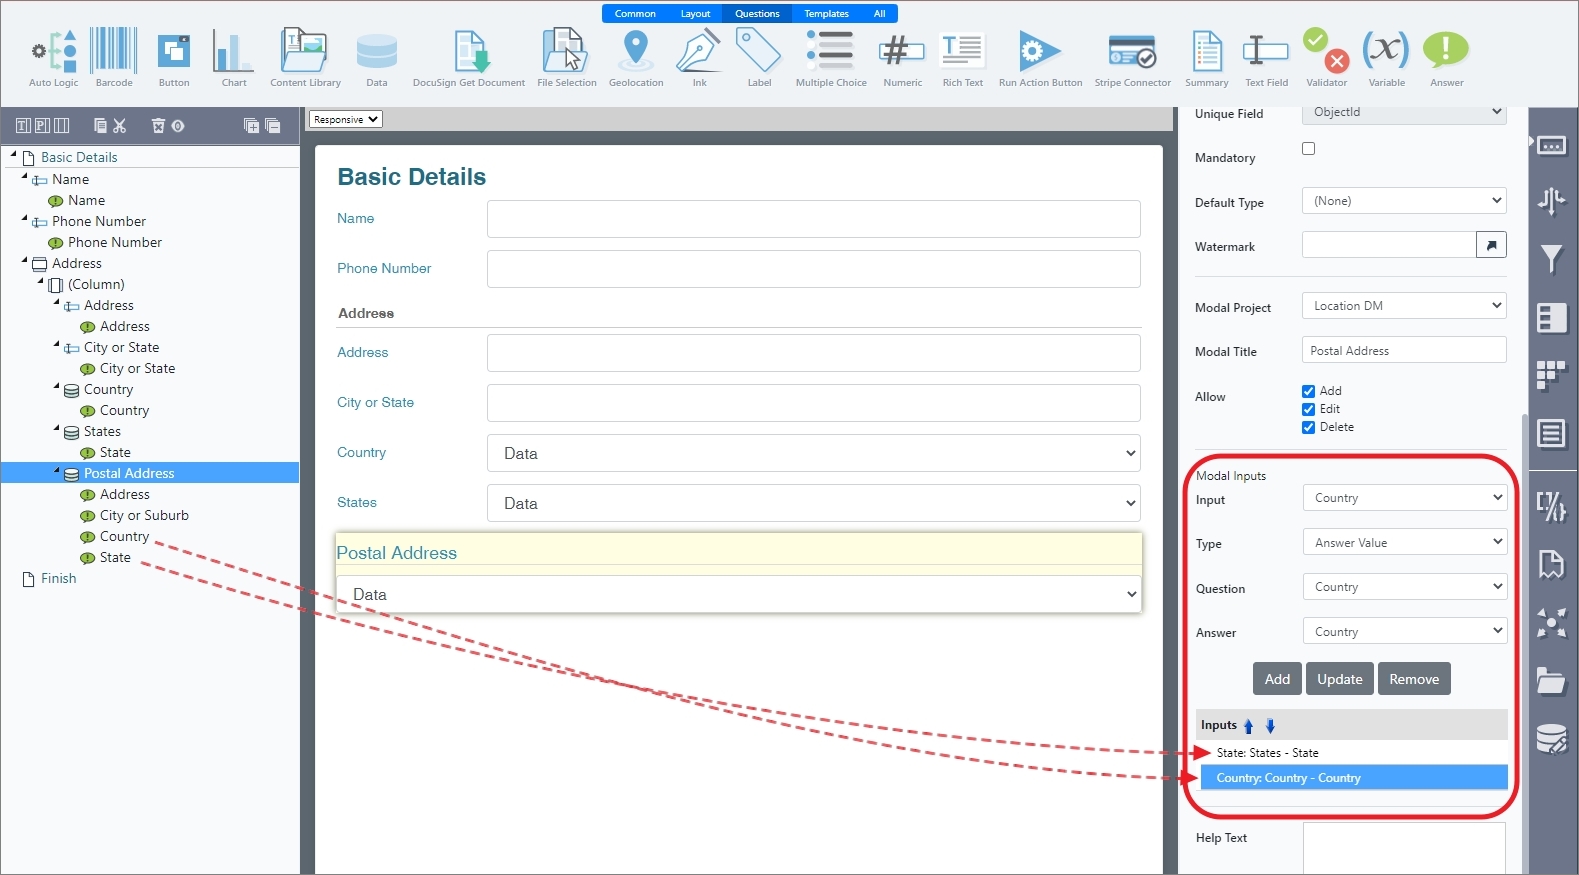
Make selections and save your project.
Updated 9 months ago
