Template - DocuSign
Before you can use DocuSign templates, you need to have the DocuSign Connector installed, a license for DocuSign in SmartIQ as well as an account in DocuSign. For more information see DocuSign Connector.
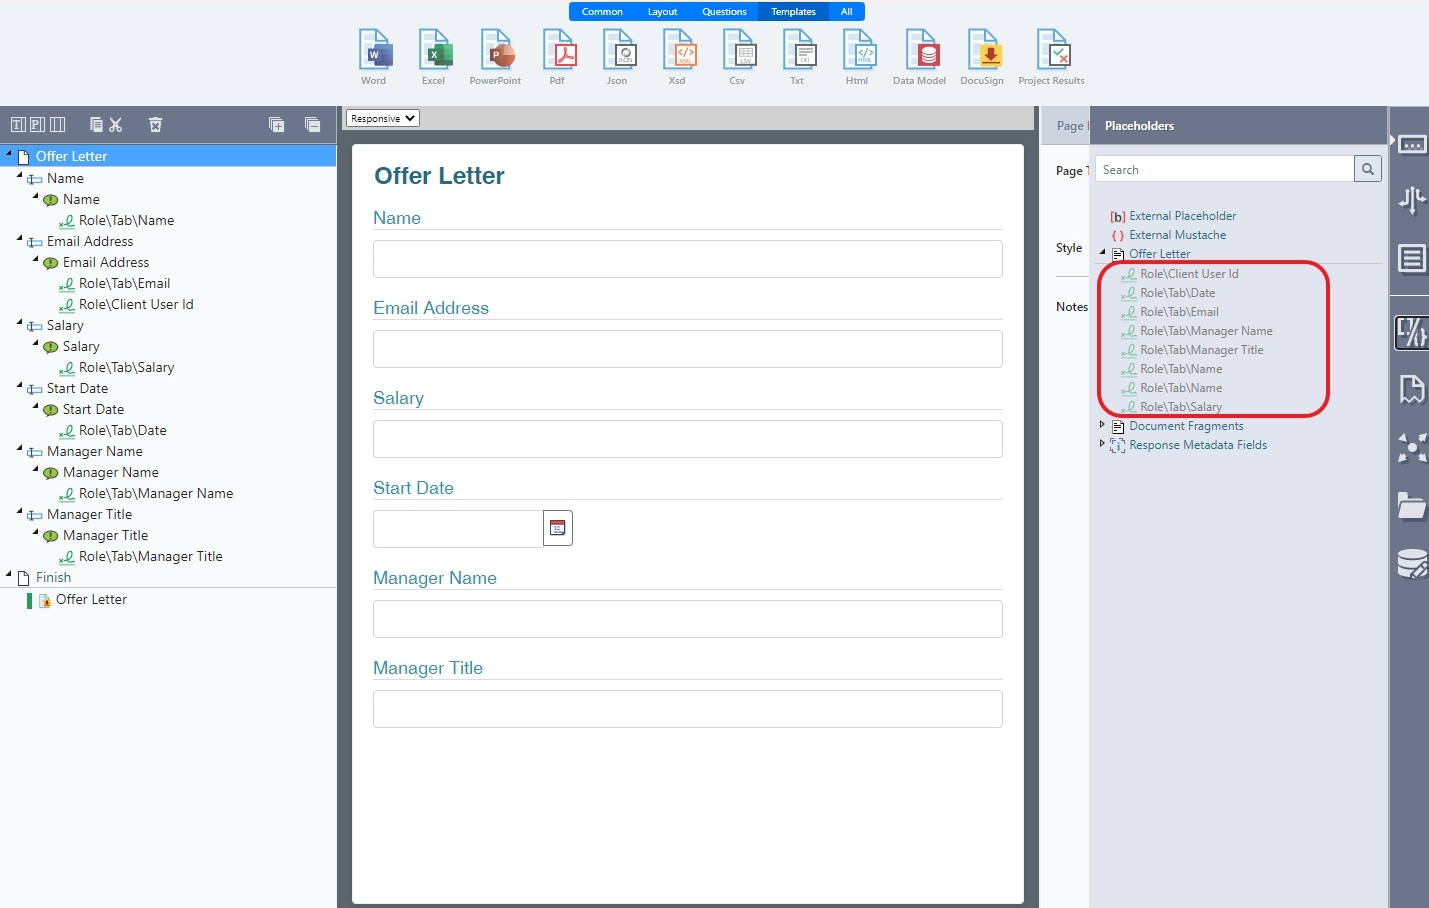
DocuSign has a concept of a predefined template which can have fields for the user to fill out when signing. The DocuSign template type allows the selection of an existing template that retrieves template information directly from DocuSign and prefills any tabs from the Data Label field from DocuSign. Each field has a corresponding placeholder for mapping in Design. The available tabs will show as placeholders on the template in the format {{role}}\Tab{{tab label}}.
Produce will send the DocuSign envelope any time the template is generated. This means that you will not be able to download a document with this template type.
Using DocuSign Templates
- In SmartIQ Design, add fields to the form.
- Choose Templates from the object type bar and then drag the DocuSign template type to the Finish page.

- Select the DocuSign template from the drop-down list.
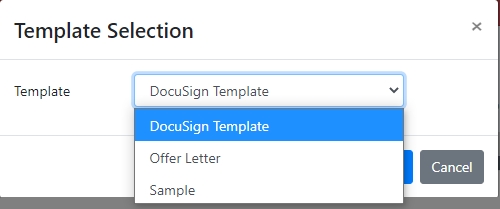
- Click OK and the DocuSign template will be added to the project.
- On the right hand side, select the Placeholders icon and you will be able to see that all the placeholders have been added for the Data Model.
The available tabs will show as placeholders on the template in the format {{role}}\Tab{{tab label}}. Add the placeholders to the relevant answers in the project as needed.
DocuSign PlaceholdersThe default tab label in DocuSign is the TabType + Random Guid. We recommend changing this to something more meaningful for easy identification in the template editor.
Notes:
- Supported tab type are text, list, checkbox, radio, and number. This includes any saved custom tabs.
- Name and email placeholders will also be added if the template recipients have not defined an email address in the template
- On the template properties, click Refresh template to ensure that you are using the latest template with any changes that have been made lately.
- Save your project.
Using a DocuSign template with the DocuSign Actions
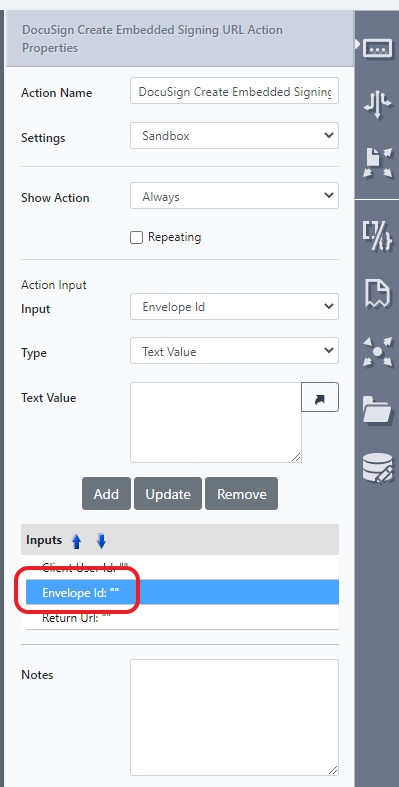
When using the DocuSign template, the user does not need to use the DocuSign Create Envelope action with any DocuSign action. Because of this, on the Action Properties tab of every DocuSign action, select the Envelope Id and click Remove.
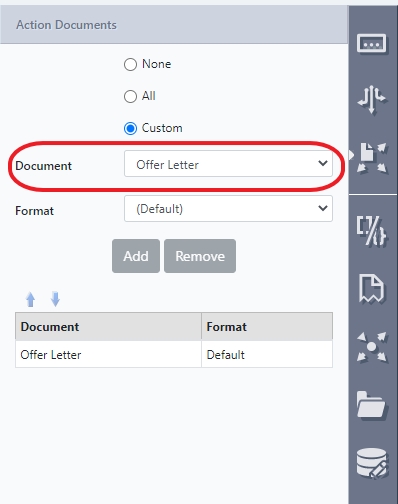
Additionally, if multiple DocuSign templates are supplied (for instance if "all" Action Documents are selected and the project generates more than one DocuSign template) the templates are selected according to the action document ordering. Because of this, SmartIQ recommends supplying a specific DocuSign template rather than relying on this ordering.
On the Action Documents tab, select the DocuSign template from the drop down list and click Add.
Configuring an Embedded Signing Ceremony with a DocuSign Template
The DocuSign Create Embedded Signing URL action has the ability to use a SmartIQ-native DocuSign template as an Action Document. This action redirects to signing instead of sending the form to email.
- Create a form using the DocuSign templates.
- In the Action tab, drag and drop the DocuSign Create Embedded Signing URL action to the Finish page.
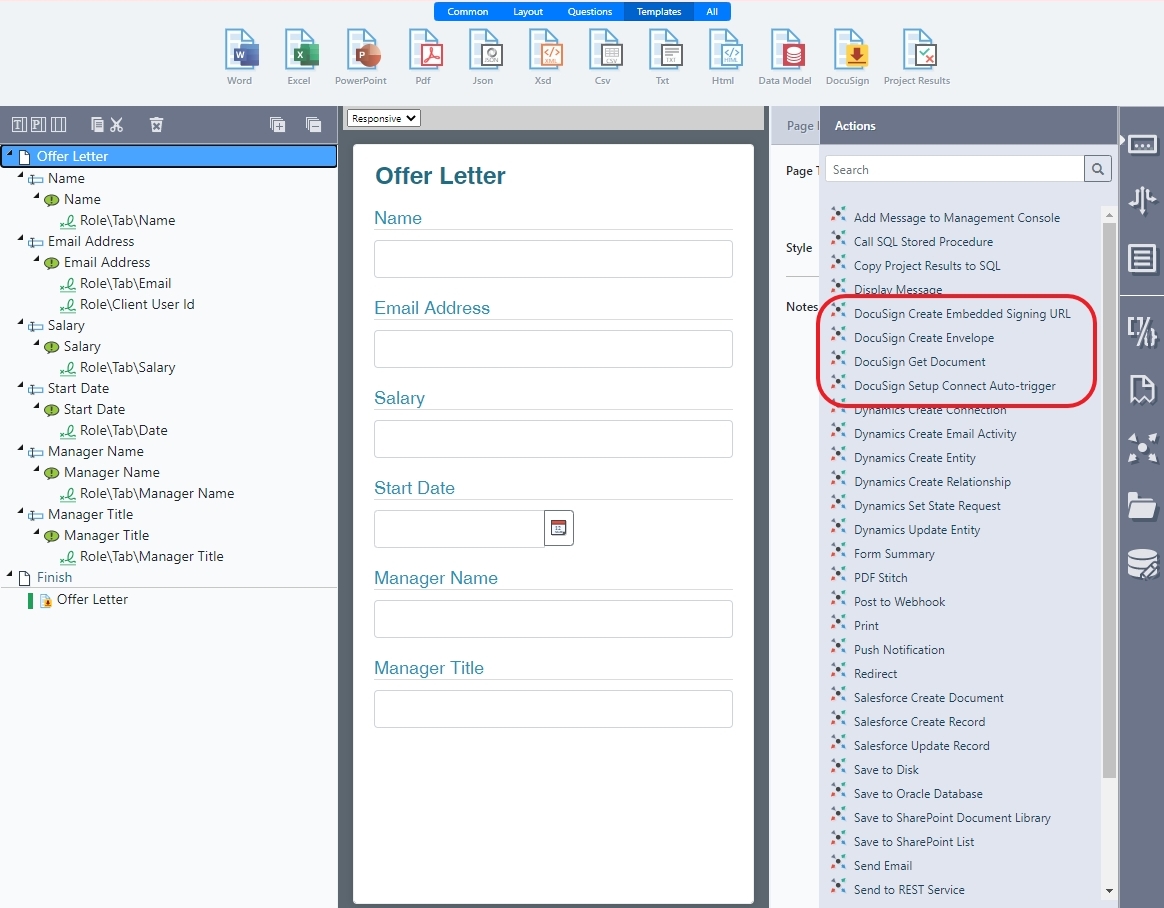
- In the Placeholder tab for the DocuSign Create Embedded Signing URL action, map the Client User Id to a unique identifier.
- In the DocuSign Create Embedded Signing URL Action Properties tab:
- Provide the Client User Id and Return URL values
- Delete the Envelope Id.
- Save and validate the project.
Updated 9 months ago
