Theme Builder
Theme Builder allows you to create and manage themes that reflect your brand's look and feel in SmartIQ Produce.
Themes allow you to control a range of visual elements from logos and colors to typography and styling. With the ability to create any number of themes, you can set one global theme for Produce, and then set different themes for specific published projects, even re-use a theme for multiple projects. For more information, refer to Theme Settings.
Theme Builder lets you see your changes as you go with a live preview built into the interface, making it easy to create your brand and instantly see it in context.
Theme Builder Overview
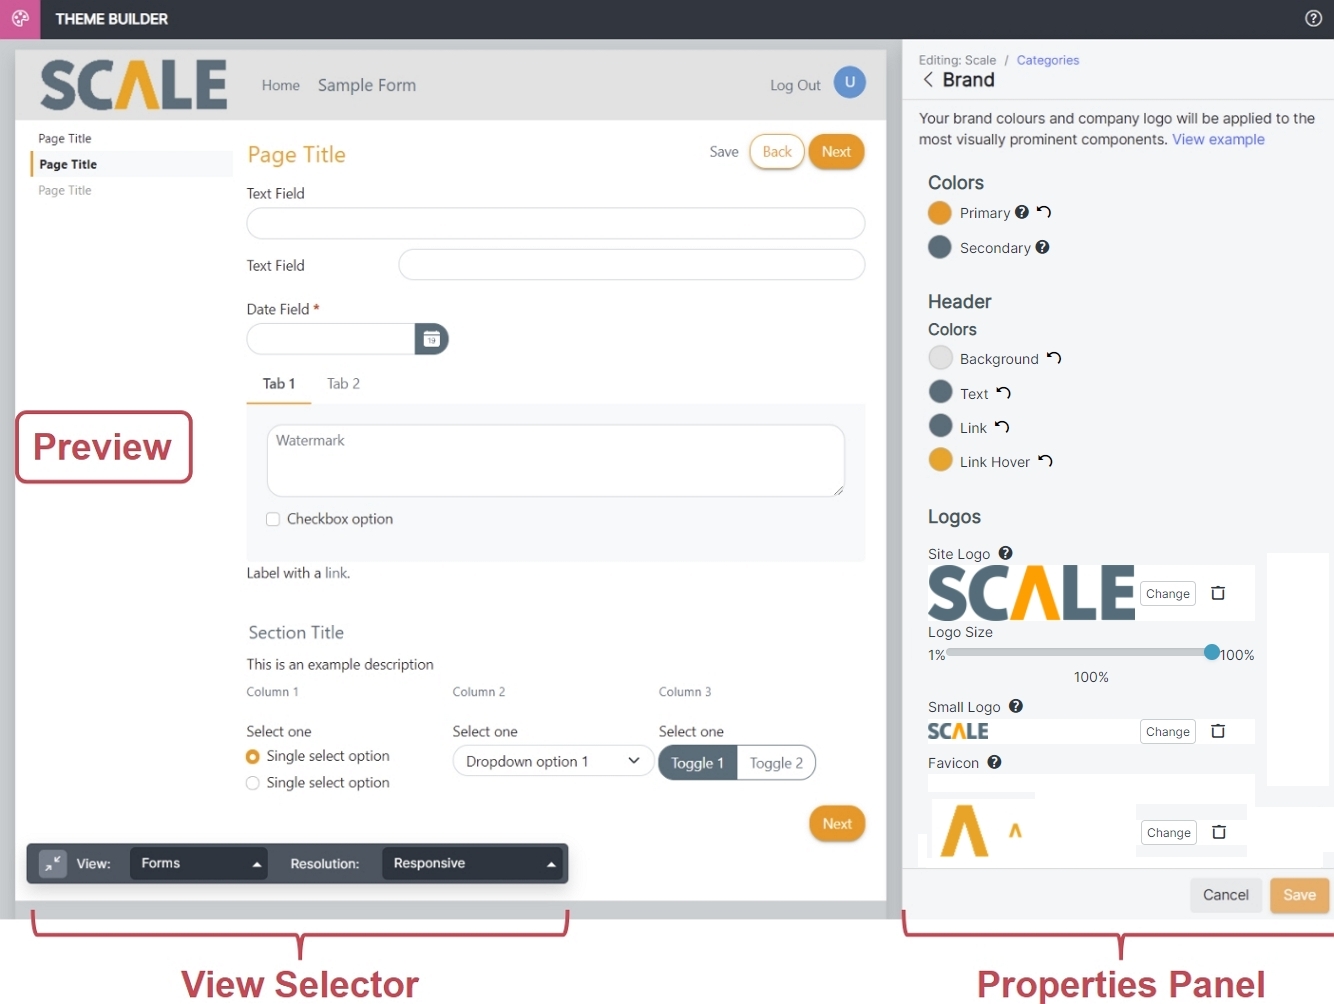
Preview
The preview area provides a live view of how your theme looks in context. Use the view selector or view example links in the properties panel to select what context the preview is showing.
You can change which theme is being previewed by selecting the theme in the properties panel. When no theme is available, the preview simply shows how things look by default without a theme.
View Selector
Use the view selector panel to change the preview content and resolution.
Available views include:
- Home - this is an example of the Produce home page.
- Sample Form - this is an example of a form in Produce with a range of controls in a typical layout.
- Component - this is a list of various components arranged by category to easily find examples based on any of the adjustable attributes in your theme.
- Login - this is an example of the Login page.
Properties Panel
The properties panel is the main interface for making changes to your theme.
All interactions to create, modify and even delete themes are available in the properties panel, which provides drill-down navigation to progressively reveal more detail.
For more information on using properties panel to create, modify or delete a theme, refer to the relevant sections in this guide or refer to this guide for more information on designing themes.
Resizing the Properties Panel
The properties panel can be made bigger or smaller when you drag the left edge of the properties panel, which will in impact the available space for the preview area. This can be useful for providing more room for your properties or conversely to see a bit more of the preview area.
Login Page
Theme Builder can be used to style the login page using your brand’s primary color and logo. You can override the default login page logo, as well as setting a solid color or image to use as the background of the login page. This enables dynamically rendering a new, on brand login experience on the various login, reset and access code screens used for unauthenticated users.
For more information on designing the login page, refer to this guide.
Accessing Theme Builder
There are two ways to access Theme Builder, option 1 is for users with Change Settings permission while option 2 is an alternative method if you are managing published projects. Either method provides access to the same Theme Builder experience where you can manage any themes.
For more information about access permissions, refer to Theme Builder Permissions.
-
In SmartIQ Manage:
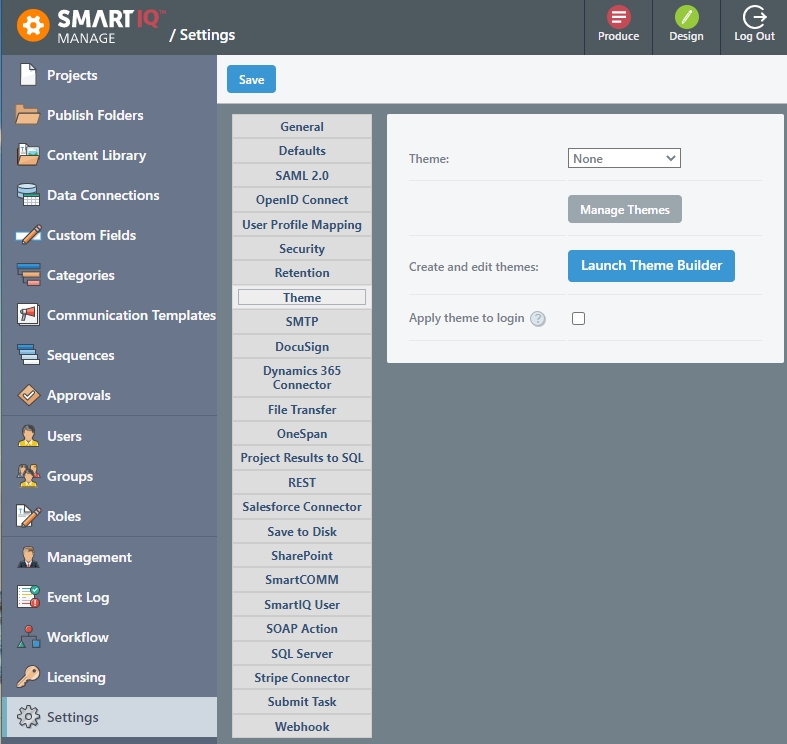
- (Option 1) Go to Settings > Themes.
- (Option 2) Go to Publish Folders, open a folder and click the Theme tab.
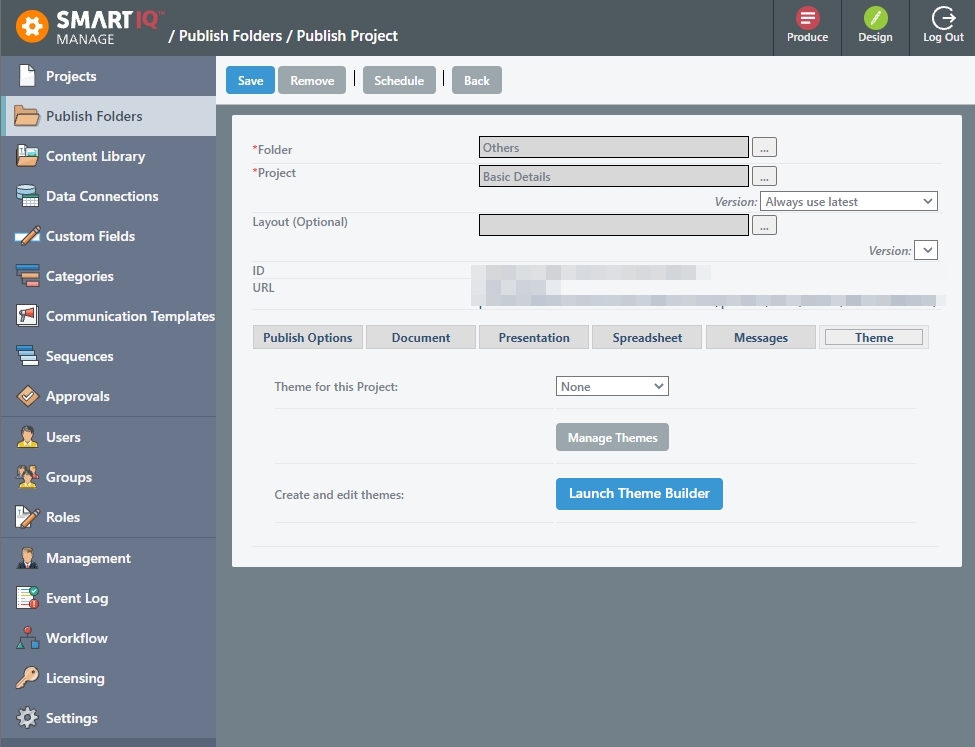
- Click the Launch Theme Builder button.
Creating a Theme
When creating themes, you can start from scratch or start from an existing theme and make any adjustments needed.
-
In the Theme Builder properties panel, click the Create Theme button.
-
Specify a name for the new theme, which must be unique.
-
(Optional) Click the Create from existing theme option and select the theme from the drop-down list to create a theme from an existing one.
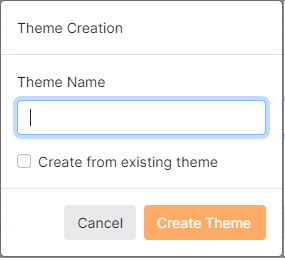
NoteThe Create from existing theme option will only appear if there is already an existing theme.
-
Click Create Theme. Your theme is now ready to be configured.
-
Change the components and styling elements in the properties panel. See Designing Themes in Theme Builder for more information.
In Theme Builder, while modifying a theme, you can navigate around the various categories and make any changes you like, even see a live preview of those changes, all without saving the changes. Only once changes are saved can users see them take effect in Produce.
- Click Save.
Modifying a Theme
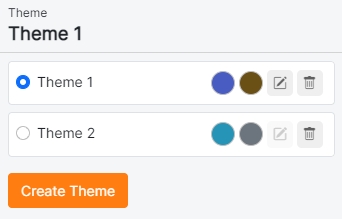
- In the Theme Builder properties panel, select the theme you wish to modify. This will refresh the preview and enable the edit button.
-
Click the edit button.
-
Change the components and styling elements in the properties panel. See Designing Themes in Theme Builder for more information.
In Theme Builder, while modifying a theme, you can navigate around the various categories and make any changes you like, even see a live preview of those changes, all without saving the changes. Only once changes are saved can users see them take effect in Produce.
- Click Save.
Deleting a Theme
- In the Theme Builder properties panel, click the delete button (trash icon) for the theme you wish to delete.
The Theme Deletion confirmation displays.
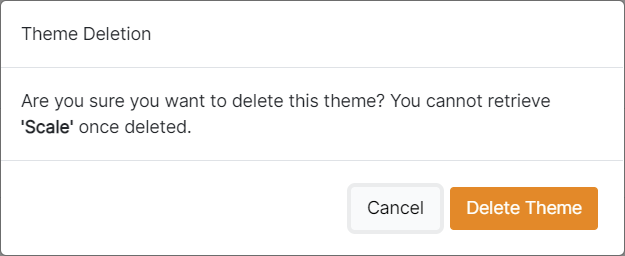
- Click Delete Theme.
Your theme is now deleted and removed from Theme Builder. If it was in use at the site or published project level, these references will be removed.
Migrating Themes (Import/Export)
Themes can be migrated from one environment to another, for example from preview into a production environment. However, exported theme files will only be compatible for import in another SmartIQ system of the same version.
Project ExportExporting a project or sync package will not include themes. Theme files will have to be exported/imported separately.
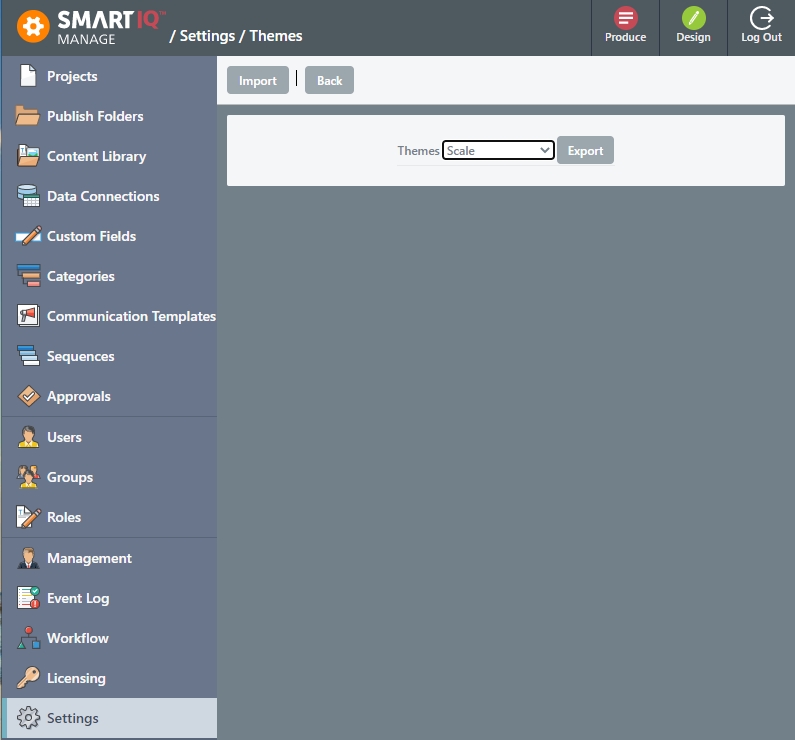
Export/Import Themes from the Manage interface or an Admin API.
From the Manage Interface
Export theme package will create an <name>.iqtheme file, with a JSON file that provides the theme information.
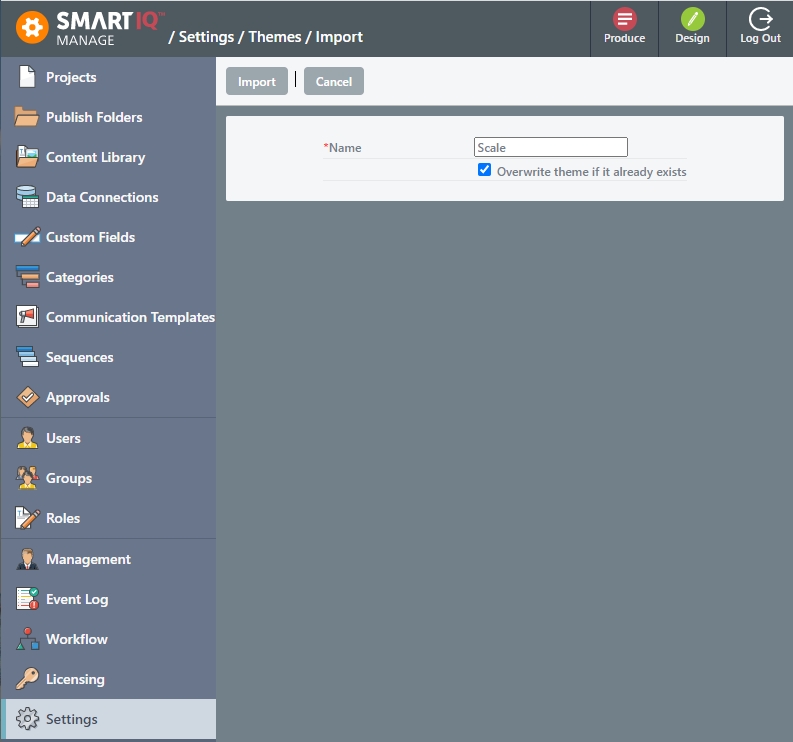
Importing an .iqtheme file presents the project name with optional import overrides.
Use the Admin API
This is done via the admin API, either by writing code or using a third-party tool such as Postman.
Using the Themes API you can:
- Retrieve a list of themes, including each theme ID
- Export a theme by ID as JSON data
- Import a theme from JSON data
For themes that are applied at a published project level, you can also export them with the published project as part of a Sync Pack.
Updated 9 months ago
