
Custom Properties
SmartIQ Designers can define a default value, this value will be set when the form is loaded.
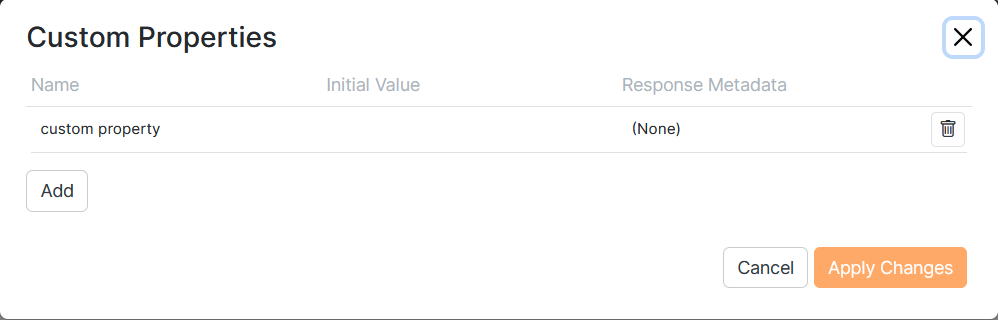
SmartIQ Designers can access Custom Properties values using the a Reference Tag[CustomPropertyName] allowing them to define conditions and rules using the current value.
Custom Property as an Action Input Type
Actions can have a Custom Property mapped directly as an input within the inspector panel. This means there is no need for the custom property to go through a variable or enter the Property name as a text value.
This action input can control when a Custom Property value is changed and used. This is possible using the Set Custom Property Action to define when the action will be triggered, changing the 'Run After' property described here.
Custom Property as a Data Source Filter
You can select a Custom Property Value for a data source filter. This will only be available in the filters if the property value has been defined in Custom Properties
Redirect to Custom Properties from Finish Page
Finish page properties in Design support passing parameters/Custom properties to the other specified project. Check "Include Custom Properties" and add the names and values to the next project needs. The values can be question references as well.
Passing Parameters via URL to be stored in Custom Properties
Values passed on the URL to the launch page using the pattern below, will resolve to the first Custom Property with that name and store the relevant value.
http://{SmartIQServer}/Produce/Launch?id={project publish guid}&{projectProperty1}={projectPropertyValue1}&{projectProperty2}={projectPropertyValue2}
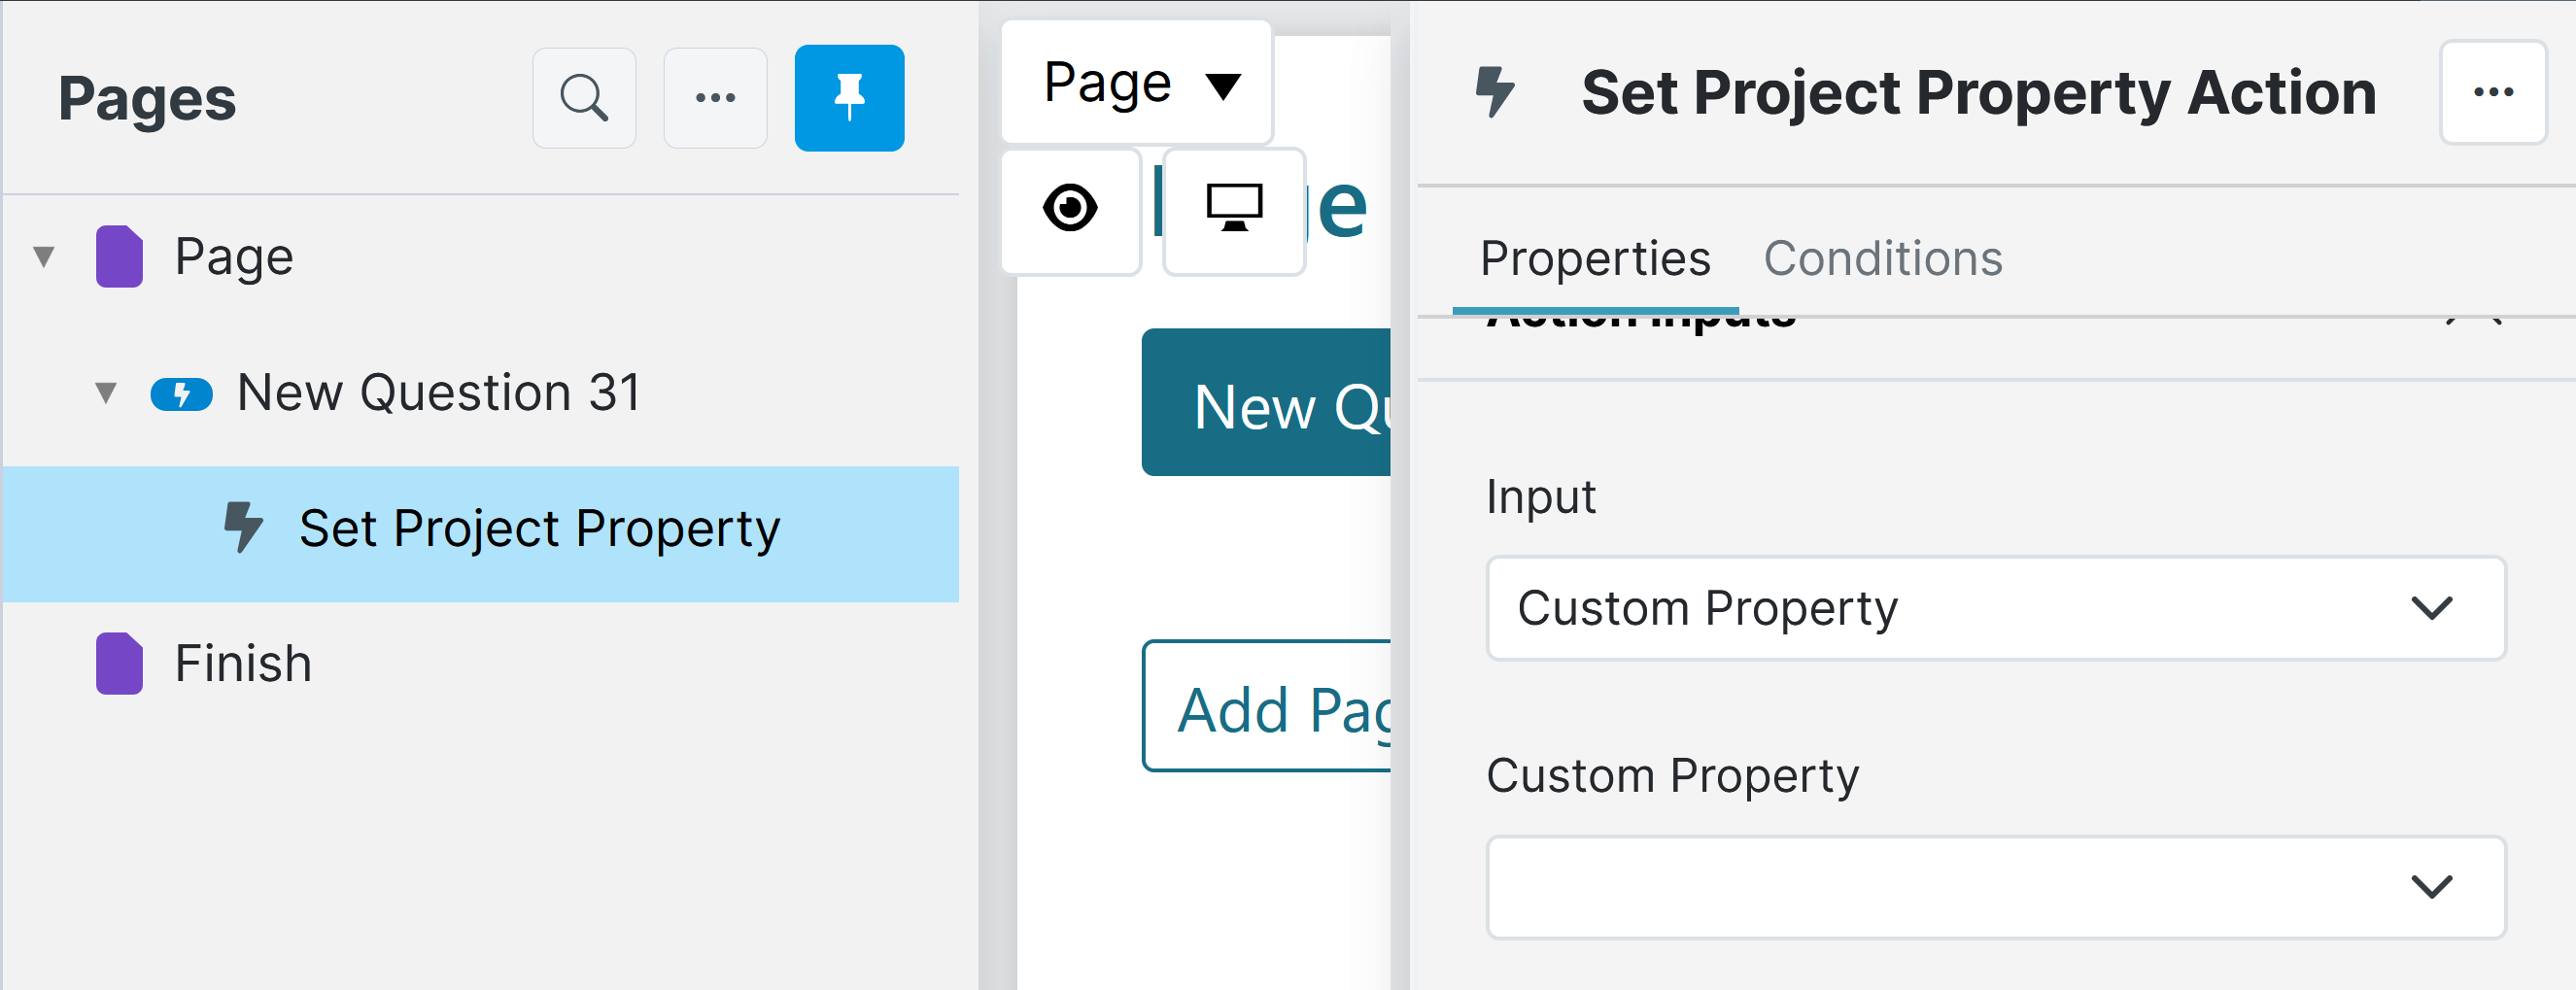
Using a Action Button to change Custom Property Value
Changing the value of a Custom property does not necessarily require the form be submitted.
Adding a Action Button to your form and then adding a Set Custom Property Action will allow Designers to change the default value of one or many Custom Properties. This Action only requires the name of the Custom Property (no need to add '[ ]').
Change Custom Property Value on Workflow Transition
Workflow transitions can also modify Custom Property values. This is particularly useful to change a value for the remainder of the workflow or for the next immediate State. Typically this will be used to record that an event or state (e.g payment, updated) has occurred at least once.
Selecting a transition in the workflow diagram will show Custom properties on the right hand tool bar (requires at least one project property to exist before it is displayed). In this section the designer can configure the properties they want to change the value on as the user progresses down this path of the workflow.
Blank values are also allowed if the property is to be cleared (e.g form has moved backwards in the workflow and needs to reset some state)
Setting a Custom Property on a transition will not set the value until after Workflow Assignment.
If you need to use a Custom Property prior to Workflow Assignment (eg: for another action), use the Set Custom Property action and ensure it is configured to nothing later than 'Run After Document Generation'.
Custom Property saved as Response Metadata
It is possible to link a Custom Property to a Response Metadata, updating the value for In progress Forms. Select a Response Metadata from the drop down when defining a Custom Property. Only Response Metadata available will be displayed, so you might want to refresh lists to force an update
Once the Custom Property value is defined in the form, the value will also be saved into the respective Response Metadata in Manage. This is especially useful for In Progress forms that are displayed in Dashboards using a SmartIQ data source that includes Response Metadata as display fields.
Updated 3 months ago