
Rich Text
The rich text box is an inline text editor that allows users to apply various formatting options including, bold, italic, symbols and subscript, through to complex tables, numbered lists and hyperlinks. The rich text box includes a spell checker.

Usage
Rich text is used for situations where larger sections of formatted content are being captured.
Also users are able to select formatting based on a collection of predefined Word styles. The available styles include any non-standard text styles contained within the base document or content library.
Add the question into the desired location in the project or Pages Panel
A Rich Text question keeps its source format when pasting from formatted content like Word.
It can also insert styled content into templates that are style aware such as Word templates. Some non-style-aware templates include fillable PDFs, text files, and JSON. Inserting content into these templates will result in the HTML tags being inserted as well.
Properties
| Property | Description / Examples |
|---|---|
| Default Value | Default text to display when the rich text box is displayed in the web form. Can contain HTML. |
| Text Rows | The number of rows that are displayed to the end user in Produce. By default, pressing Enter adds a new paragraph, which is more than one row in height. Shift-enter will reflect an accurate row height. This property allows up to 5 digits. The designer can set a maximum limit of up to 99999 characters. |
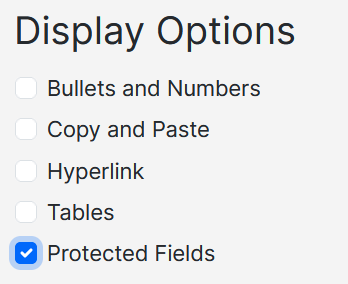
| Display Options | The following rich text box functionality can be allowed where needed. Bullets and Numbers Copy and Paste Hyperlinks Styles (available if a form has documents) Tables |
| Style | The supported style properties are font, colour, size, bold, italic and underline |
Protected Fields
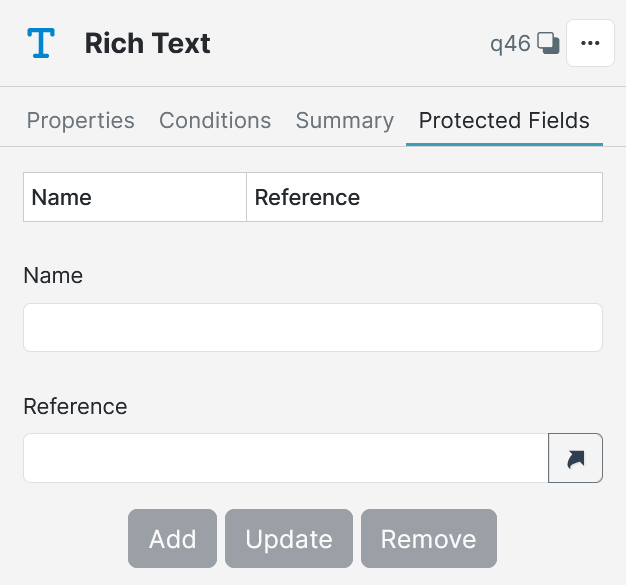
Protected Fields can be used to insert data that cannot be changed into Rich Text questions. The protected data will only update if the information it references is updated elsewhere.
To enable these options for the end user, select the 'Protected Fields' display option in the inspector panel.
Under the 'Protected Fields' tab, in the inspector panel, protected fields can be defined.
Updated 5 months ago