
Workflow Design
Review the workflow interface overview section in Design Overview.
Workflow is integrated into the design environment and is comprised of workflow blocks, transitions, actions and escalations. Active tasks and past history of a workflow are available in Workflow Manage.
Workflow Blocks
Blocks are the individual states, approvals, external events, and parallel workflows that make up the workflow stages and user tasks. Blocks flow from one task to another via transitions, completed sequentially or in parallel, from start to finish.
Blocks can be created by dragging from the blocks menu, or clicking an empty grid marker to reveal a pop-up menu. Names of blocks are limited to 200 characters.
| Block | |
|---|---|
| States and Escalation | A state block is a common step in a workflow process, that is reached via a transition from a previous state and assigned to a user or group to complete. |
| Approvals and Observers | An Approval is a step in a workflow that acts as a gateway, where the responses provided in the form thus far can be reviewed and, if appropriate, altered before progressing. |
| Workflow Event | An external step in a workflow that needs to be actioned by a system outside of the SmartIQ platform via Cloud-to-Cloud Integration (C2I). |
| Parallel Workflows | Parallel blocks create a sub-process that allows multiple workflow states to occur in parallel by assigning states to multiple users simultaneously. |
Start and Finish Blocks
Start is the initial state for all workflow projects, and, while it cannot be deleted, it may be renamed and otherwise behaves very similarly to a regular state. This is commonly used to initiate a process or request, capturing data from the requester. Users who initiate a workflow form in this state are considered the workflow Creator.
Finish represents the final termination of the workflow and is always present in a workflow. It has no properties and, as such, is not selectable in the canvas, and can only have inbound transitions. Once a workflow reaches this state, it cannot progress further and is therefore considered completed.
Transitions and Assignments
A transition is the acting link between the end of one block and the beginning of another, creating paths within a workflow. These paths define which Users or Groups to assign the next block's task, and any actions that need to be performed before the next task or after the previous task has been completed. These can be assigned in the Inspector panel.
Create transitions by clicking on the circle next to a block and dragging the transition to the next state. Alternatively drag the transition from the blocks menu.
Ensure that all transitions eventually point to the finish block to avoid never ending workflows
Or ensure that transitions from a block have mutually exclusive conditions with the next block, then users will be pretended with a "select where you want to go" option in produce
There are three types of transition line:
- Grey unbroken line – Normal transition between two states
- Green unbroken line – Approved path transition from an Approval to another state
- Red broken line – Rejected path transition from an Approval to another state
| Property | |
|---|---|
| Send To | Creator – Assign the state to the user who originally created the workflow. Current User – Assign the state to the user who is completing the current state, which creates a chain of states that need to be completed by a single user. This is often used to break bigger workflows into smaller chunks (part A, part B, etc.) Previous – Assign the state to the owner of the previous state, useful for returning workflows for edits. User – Assign the workflow to a specific User. Group – Assign the workflow to a specific Group. Unlock on Exit – When workflows states are assigned to a group, only one person can work on the form at a time. This means that when a user opens a workflow, this user locks the form to themselves. If the user does not complete the workflow in one session, this option, on by default, ensures that the workflow will be unlocked when the user leaves the forms enabling someone else in the group to continue working on the form. Temporary user – Assign the workflow to Guest or Anonymous users when Guest User Save/Reassign has been enabled. |
| Send To Type | only applies to user and group assignments and defines how the specific recipient should be selected:Specified – Pre-assign the workflow state to a particular user or group. Search – Provides an option where the user completing a form can search for a user or group of their choice. Question Reference – Links to a question reference that resolves to a named user or group to assign the workflow to. For example, a data connection could be used to determine an appropriate manager. References must resolve exactly to a specific username or group name. |
| Allow Reassign | Allows an in-progress workflow to be reassigned. When selected, select who will be given reassign rights: By Current Assignee – (Default) The person currently assigned to the workflow. This user can click the Reassign button from a produce Dashboard or Home page . By Creator – Whoever submitted the first form By Previous Assignee – The person who assigned the workflow to the current assignee. The Creator and Previous Assignee user types can reassign from Workflow Produce for a workflow that they have are a part of. |
| Send Email | Defines whether to send a notification email to alert the recipient that a workflow has been transitioned to them. Send Email (ON by default) – This will send an email to whoever the state is assigned to. Email Subject/Body – Content of the email. To use the Communication Template Subject, remove the contents of the Email Subject option on this screen. Email Subject and Email Body can use Reference Tags such as [ProjectLink] [AccessCode] [Comments] [ProjectName] and [StateName]. |
| Show Next Steps | Displays Name of next task. |
| Show Send To | Displays user/s assigned to the next task. |
| Show Comment | Default comment, which may contain question refences, included in comments textbox. |
| Comment Mandatory | Enforces user to provide a comment. |
| Redirect on Finish | When selected will prompt whether to go back to the home page or a particular form or URL after finishing the form. |
| Document(s) | Allows the designer to specify documents to be available to be downloaded when the transition is triggered. |
| Start Page | Allows the designer to specify on which particular page the next form will be loaded, often used for skipping content that is generally not relevant because it has been completed by another user, while still allowing the user to navigate back to said content. |
Conditions
In some cases, a block may have multiple transitions to other blocks. For example, if the workflow is an approval process and the workflow is approved, it will go to one state. If the approver doesn't approve, it may go to another state. This can be defined within the transition conditions.
Transition conditions work the same as all other Conditions within SmartIQ. However, the only available condition type is Answer Value.
For complex conditions you need to pre-evaluate the desired logical condition in a variable, then for the condition compare the pre-evaluated result to true or false (1 or 0).
Actions
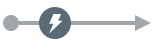
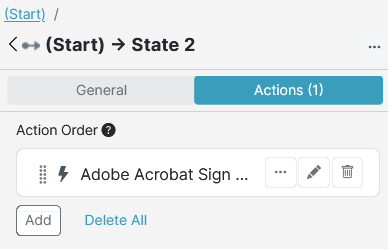
Actions generally act in the same way and have the same features and properties as the usual form design Actions. To add actions to the workflow they must be attached to transitions. Transitions with actions show an action icon.
Click the icon to open the 'Actions' tab in the Inspector panel. From the 'Actions' tab you can click on the  icon to open that actions properties in the inspector panel. You can also reorder actions by clicking and dragging the
  icon.
icon.
Workflow Transition Sequence
When a workflow transitions between blocks, a number of operations are performed in order. These operations are separated into stages to allow for control over the ordering of Actions which are associated with the transition.
The sequence of a workflow transition is as follows:
- Actions set to "Run After Submit" are executed
- Data stores are executed
- Documents are generated
- Actions set to "Run After Document Generation" are executed
- Next workflow state is created
- If the task is to be assigned to a Temporary User, the user is created
- Actions set to "Run After Workflow Assignment" are executed
- Notification of the workflow task is sent to the assigned user/group
- Escalations are generated and stored
- Escalations are added to a queue when the state is created. The queue is processed at a 15-minute interval. A given escalation will be run at the next processing interval after the selected time has passed.
- Actions set to "Run After Finish" are executed
The main stage of interest is usually Document Generation; Actions which run before this stage are unable to use generated documents but are able to generate documents for use by later actions. Actions which run after Document Generation are unable to have their documents used by other actions, but can make use of documents generated by Actions which ran earlier.
Updated 29 days ago